Single Sign-On (SSO)
Single Sign-On allows users to log into multiple applications using a single user account (credentials).
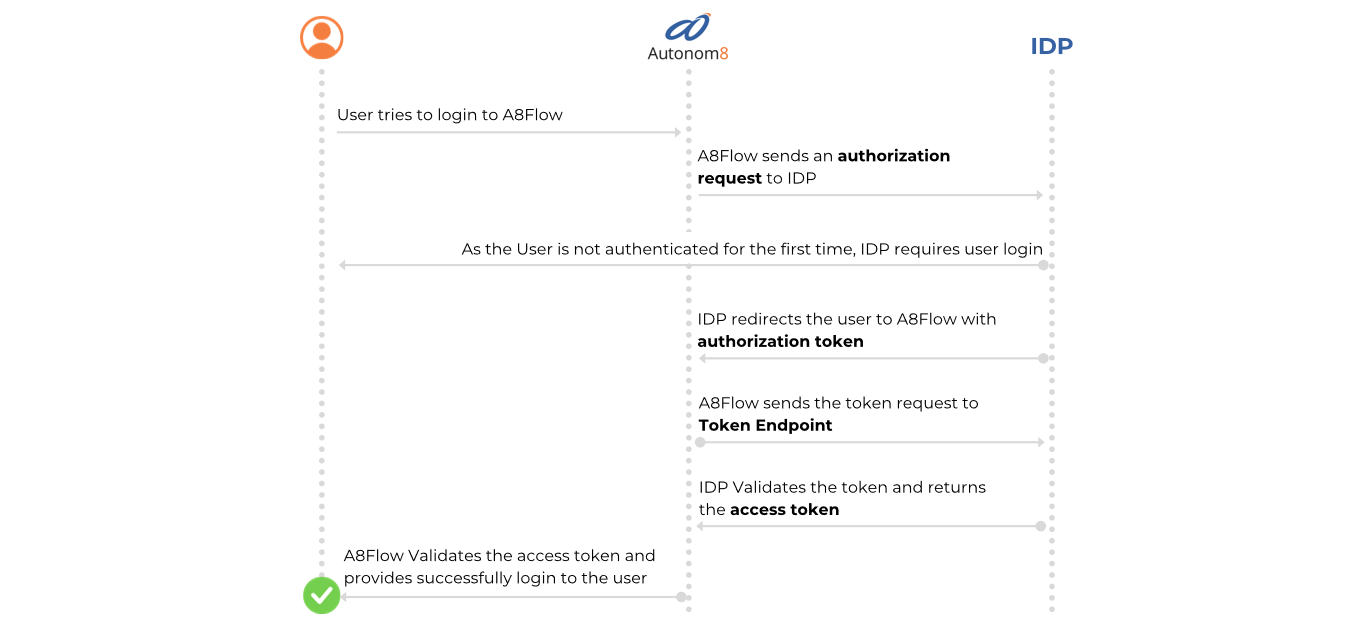
Here's how the SSO feature functions in A8Flow.
Configuring SSO
To setup Single Sign-On, navigate to Administration > Security > SSO.

In the SSO configuration screen...
- Enable Single Sign-On.
- Select the SSO Provider.

| Protocol | Protocol Description |
|---|---|
| OpenID Connect (OIDC) | Identity layer on OAuth 2.0 for authentication and SSO, using JSON for lightweight data exchange. |
Mixed Mode Authentication
Once SSO is enabled, the Mixed Mode Authentication option appears. (By default, this setting is disabled.)
Mixed Mode Authentication enables both Single Sign-On (SSO) and traditional username/password authentication options simultaneously on the login page.

- The application initially supports only username-password authentication.
- If SSO is enabled, the login page switches to SSO-only mode, removing the username-password option.
- This limitation is resolved by enabling Mixed Mode Authentication.
Activating Mixed Mode Authentication:
Enable the Mixed Mode Authentication option.
Save the changes.
The login page will now display both authentication options:
- Sign in with Google (SSO)
- Sign in with Username and Password

- A Back button is available to switch between login methods.
If SSO is disabled, Mixed Mode Authentication will be automatically disabled, and the login page will revert to username-password authentication only.
Access Control
Default Membership:
This is the minimum set of group(s) that a new user (who logs in for the very first time) will be assigned to.
Note: Make sure you select atlease one of these - Web or Mobile groups. As, this affects the users' ability to log into the Desktop or Mobile version of the platform.
- Click the (+ Add Group) button.
- Select the Group(s) from the drop-down.

Administrator: Enter the email address of the user who will be granted the admin privileges. Only admins can access SSO settings in A8Flow.
- There can only be one admin user for an orgainzation.
Configuring the Protocol
OpenID
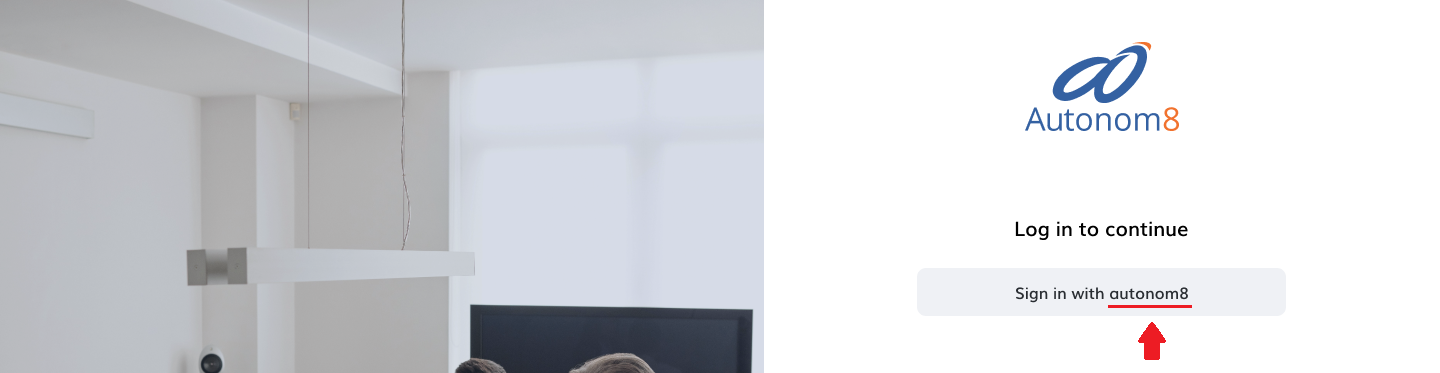
- Enter the Display Name (to fill the 'Sign in with [___]' section on the Login Screen.

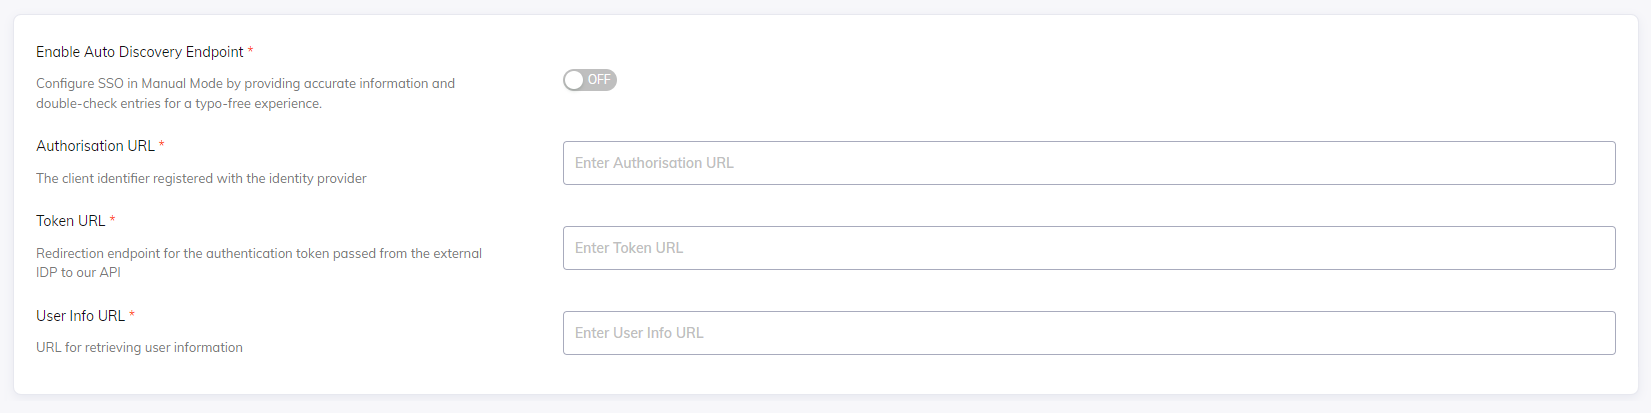
- Enable or Disable the Auto Discovery of Endpoint.
- Enabled
- Disabled
- Provide the Endpoint URL.

- Manualy provide the Authorisation URL, Token URL, and User Info URL.
- Provide the Client ID and corresponding Client Secret (from the Identity Provider).

- Click on Save.
