A8Bot V10 - Part 1
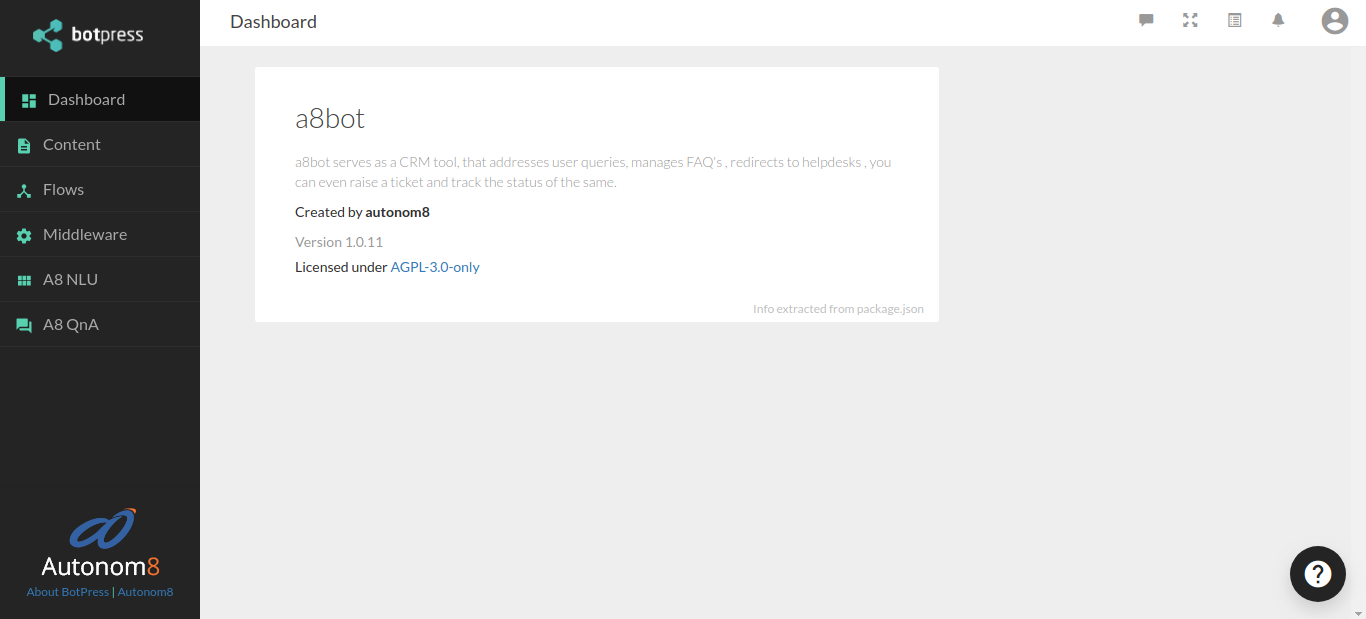
A8Chat
A8Chat is a bot platform in which we use to train the Bot as required.
Chat-Widget
Overview
You may wish to make your bot act proactively on your website in response to some action. For example, make the bot speak first, suggest that they buy the product they are viewing after a set time or ask them for feedback on services they were using.
Message Type
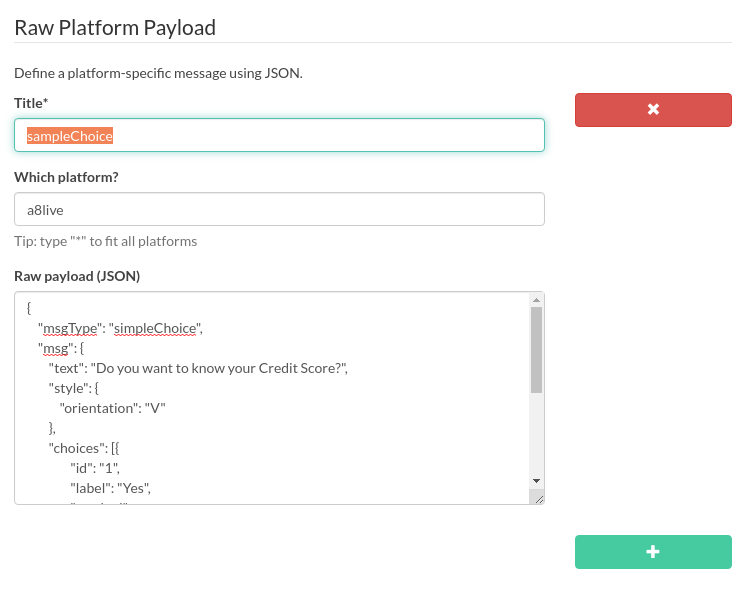
Simple Choice
Step 1: While creating a Simple choice, we need to add the "JSON" file in the Raw Payload.
{
    "msgType": "simpleChoice",
     "msg": {
    "text": "Do you want to know your Credit Score?",
    "style": {
        "orientation": "V"
    },
    "choices": [{
            "id": "1",
            "label": "Yes",
            "masked": true
        },
        {
            "id": "2",
            "label": "No",
            "masked": true
        }
    ]}
}
Step 2: After creating the Raw Payload, we need to create a flow. In the flow, select Execute code. You can view the text box below. Now, select a8Renderer and type the required name and value.
type: simplechoice (The value is based on the name which is given in the Raw Payload)
isDynamic: false
contentId: builtin_raw-x_szSw (We can get the contentId value from Raw Payload that we have created for Simple Choice)

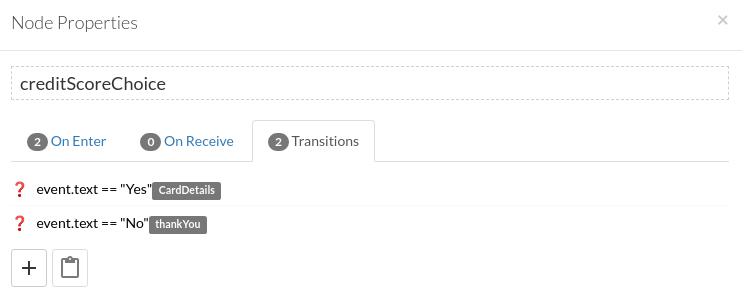
Step 3: In the Transition tab, we need to set the created SimpleChoice. Click on the + icon to open the transition tab and we have to add the raw expressions for each choice in our simple choice form.
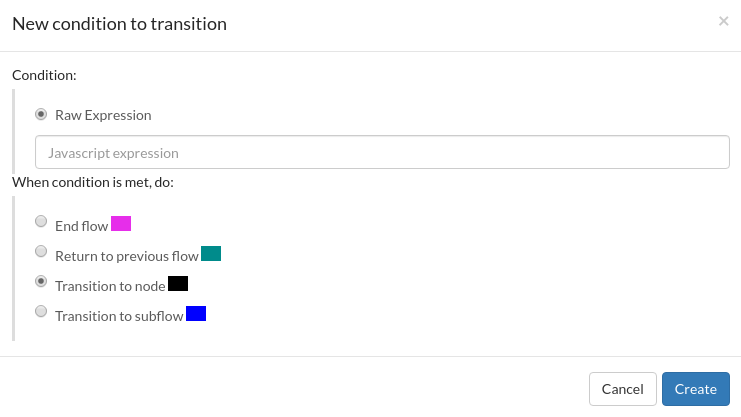
The sample raw expressions are given for your reference.
event.text=="Yes"
event.text=="No"
Output:

Card Choice
Step 1: While creating the Card Choice we need to add the "JSON" file in the Raw Payload. The steps we need follow to create the Card Choice are attached as a reference.
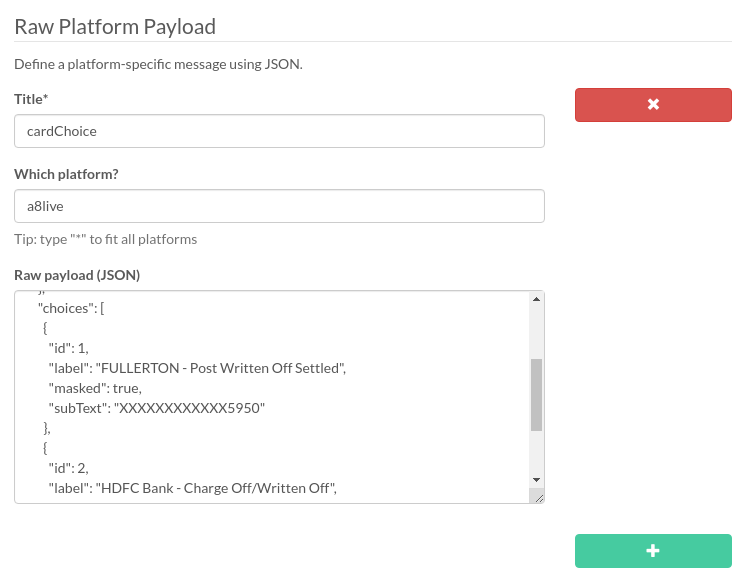
{
"msgType": "cardChoice",
"msg": {
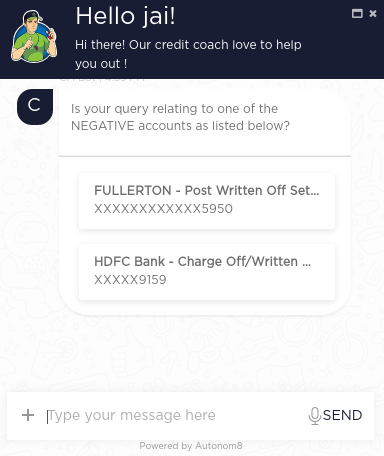
"text": "Is your query relating to one of the NEGATIVE accounts as listed below?",
"style": {
"orientation": "V"
},
"choices": [
{
"id": 1,
"label": "FULLERTON - Post Written Off Settled",
"masked": true,
"subText": "XXXXXXXXXXXX5950"
},
{
"id": 2,
"label": "HDFC Bank - Charge Off/Written Off",
"masked": true,
"subText": "XXXXX9159"
}
]
}
}
Step 2: After creating the Raw Payload we need to create a flow. In the flow, select Execute code. You can view the text box below. Select a8Renderer and type the required name and value.
type: cardchoice (The value is based on the name which given in the Raw Payload)
isDynamic : false
contentId : builtin_raw-x_szSw (We can get the contentId value from the Raw Payload which we have created for cardchoice).

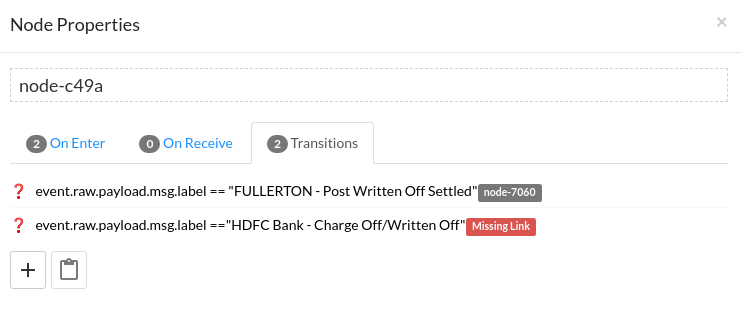
Step 3: In the Transition tab, we need to set the created SimpleChoice. Click on the + icon to open the transition tab and we have to add the raw expressions for each choice in our simple choice form.
The sample raw expressions are given for your reference.
event.raw.payload.msg.label == "FULLERTON - Post Written Off Settled"
event.raw.payload.msg.label =="HDFC Bank - Charge Off/Written Off"
Output
Data Table
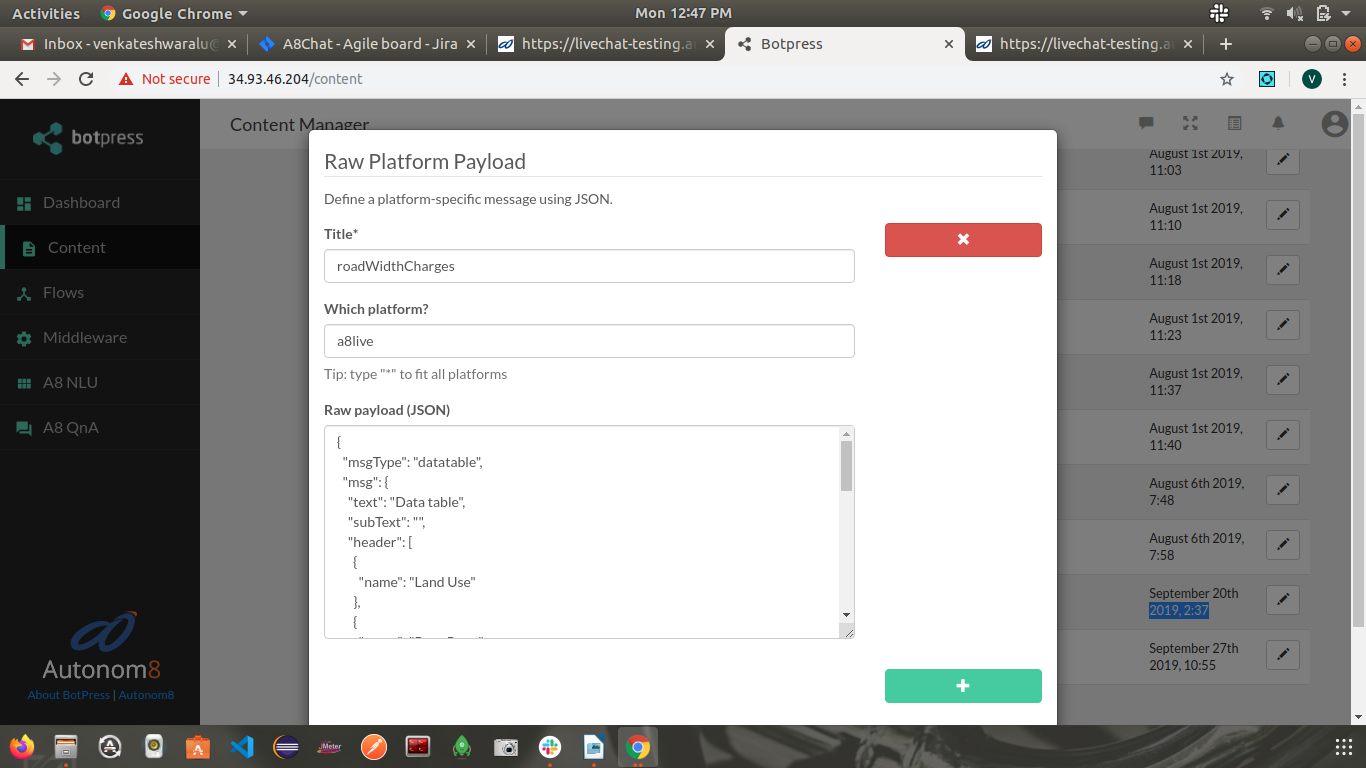
Step 1: While creating a Data Table, we need to add the "JSON" file in the Raw Payload.
{
  "msgType": "datatable",
  "msg": {
    "text": "Data table",
    "subText": "",
    "header": [
      {
        "name": "Land Use"
      },
      {
        "name": "Base Rate "
      }
    ],
    "rows": [
      {
        "data": [
          "Industrial use",
          "3200"
        ]
      },
      {
        "data": [
          "Commercial use",
          "4800"
        ]
      },
     {
        "data": [
          "Residential use",
          "9600"
        ]
      }
    ]
  }
}
Step 2: After creating the Raw Payload, we need to create a flow. In the flow, select Execute code. A text box will appear below. Select a8Renderer and type the required name and value.
For reference the sample options are,
type: datatable (The value is based on the name given in the Raw Payload)
isDynamic: false
contentId: builtin_raw-nnIaJY (We can get the contentId value from the Raw Payload with which we have created for datatable).

Carousel
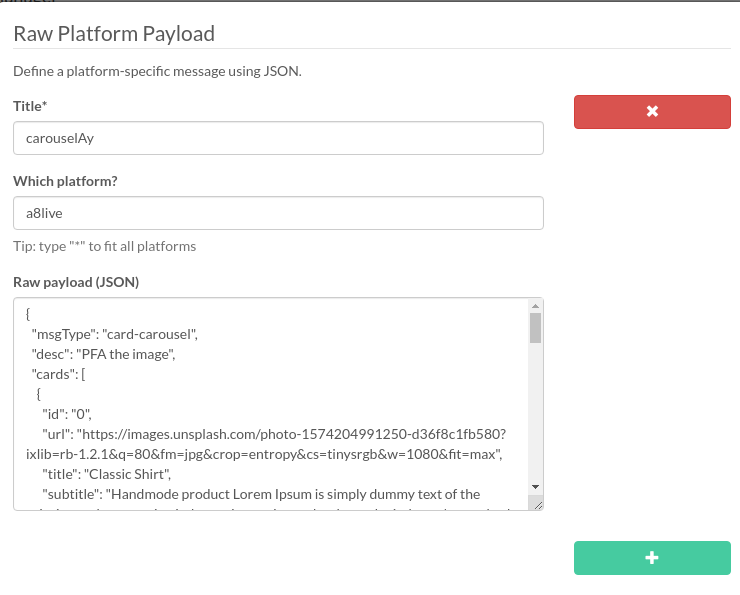
Step 1: While creating a Carousel, we need to add the "JSON" file in the Raw Payload.
{
  "msgType": "card-carousel",
  "desc": "PFA the image",
  "cards": [
    {
      "id": "0",
      "url": "https://images.unsplash.com/photo-1574204991250-d36f8c1fb580?ixlib=rb-1.2.1&q=80&fm=jpg&crop=entropy&cs=tinysrgb&w=1080&fit=max",
      "title": "Classic Shirt",
      "subtitle": "Handmode product Lorem Ipsum is simply a dummy text of the printing and typesetting industry. Lorem Ipsum has been the industry's standard dummy text ever since the 1500s, when an unknown printer took a galley of type and scrambled it to make a type specimen book. It has survived not only five centuries, but also the leap into electronic typesetting, remaining essentially unchanged. It was popularised in the 1960s with the release of Letraset sheets containing Lorem Ipsum passages, and more recently with desktop publishing software like Aldus PageMaker including versions of Lorem Ipsum.",
      "description": "$25",
      "actions": {
        "primary": {
          "label": "Submit",
          "type": "messageBack",
          "value": {
            "property": "propertyValue"
          }
        },
        "secondary": {
          "label": "Visit us",
          "type": "openUrl",
          "value": "https://msdn.microsoft.com/en-us/microsoft-teams/tabs"
        }
      }
    },
    {
      "id": "1",
      "url": "https://s3-us-west-2.amazonaws.com/s.cdpn.io/331810/sample87.jpg",
      "title": "Some random product",
      "subtitle": "Charcoal",
      "description": "$25",
      "actions": {
        "primary": {
          "label": "Submit",
          "type": "messageBack",
          "value": {
            "property": "propertyValue"
          }
        },
        "secondary": {
          "label": "Visit us",
          "type": "openUrl",
          "value": "https://msdn.microsoft.com/en-us/microsoft-teams/tabs"
        }
      }
    },
    {
      "id": "2",
      "url": "https://s3-us-west-2.amazonaws.com/s.cdpn.io/331810/sample119.jpg",
      "title": "Faded cloth",
      "subtitle": "green",
      "description": "$15",
      "actions": {
        "primary": {
          "label": "Submit",
          "type": "messageBack",
          "value": {
            "property": "propertyValue"
          }
        },
        "secondary": {
          "label": "Visit us",
          "type": "openUrl",
          "value": "https://msdn.microsoft.com/en-us/microsoft-teams/tabs"
        }
      }
    },
    {
      "id": "3",
      "url": "https://s3-us-west-2.amazonaws.com/s.cdpn.io/331810/sample120.jpg",
      "title": "Classic Tshirt",
      "subtitle": "Charcoal Color",
      "description": "$25",
      "actions": {
        "primary": {
          "label": "Submit",
          "type": "messageBack",
          "value": {
            "property": "propertyValue"
          }
        },
        "secondary": {
          "label": "Visit us",
          "type": "openUrl",
          "value": "https://msdn.microsoft.com/en-us/microsoft-teams/tabs"
        }
      }
    },
    {
      "id": "4",
      "url": "https://images.unsplash.com/photo-1575026584098-81500f6835d6?ixlib=rb-1.2.1&q=80&fm=jpg&crop=entropy&cs=tinysrgb&w=1080&fit=max",
      "title": "Shoes",
      "subtitle": "Brown",
      "description": "$225",
      "actions": {
        "primary": {
          "label": "Submit",
          "type": "messageBack",
          "value": {
            "property": "propertyValue"
          }
        },
        "secondary": {
          "label": "Visit us",
          "type": "openUrl",
          "value": "https://msdn.microsoft.com/en-us/microsoft-teams/tabs"
        }
      }
    }
  ]
}
Step 2: After creating the Raw Payload, we need to create a flow. In the flow, select Execute code. A text box will appear below. Select a8Renderer and type the required name and value.
For reference the sample options are,
type: image (The value is based on the name that was given in the Raw Payload)
isDynamic: false
contentId: builtin_raw-FvKVch
AdaptiveCard
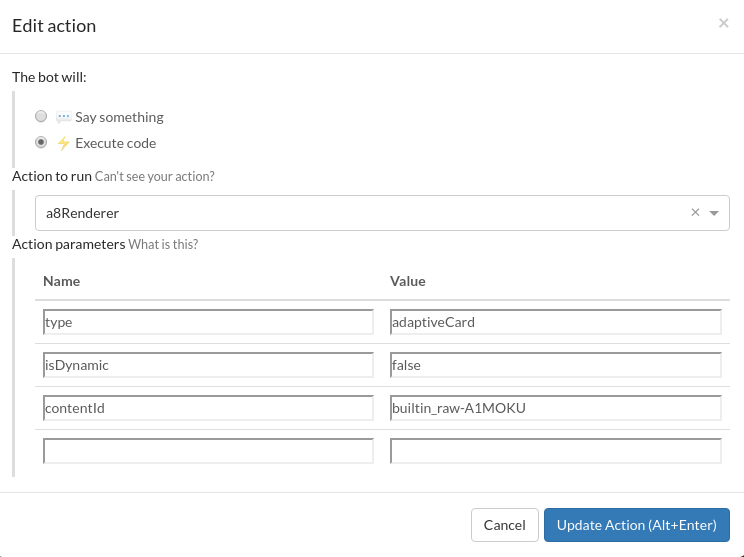
Step 1: While creating an Adaptivecard, we need to add the "JSON" file in the Raw Payload.

{
  "template": {
    "type": "AdaptiveCard",
    "body": [
      {
        "type": "TextBlock",
        "size": "Medium",
        "weight": "Bolder",
        "text": "{title}"
      },
      {
        "type": "ColumnSet",
        "columns": [
          {
            "type": "Column",
            "items": [
              {
                "type": "Image",
                "style": "Person",
                "url": "{creator.profileImage}",
                "size": "Small"
              }
            ],
            "width": "auto"
          },
          {
            "type": "Column",
            "items": [
              {
                "type": "TextBlock",
                "weight": "Bolder",
                "text": "{creator.name}",
                "wrap": true
              },
              {
                "type": "TextBlock",
                "spacing": "None",
                "text": "Created {{DATE({createdUtc},SHORT)}}",
                "isSubtle": true,
                "wrap": true
              }
            ],
            "width": "stretch"
          }
        ]
      },
      {
        "type": "TextBlock",
        "text": "{description}",
        "wrap": true
      },
      {
        "type": "FactSet",
        "facts": [
          {
            "data": "{properties}",
            "title": "{key}:",
            "value": "{value}"
          }
        ]
      }
    ],
    "actions": [
      {
        "type": "Action.ShowCard",
        "title": "Set  due date",
        "card": {
          "type": "AdaptiveCard",
          "body": [
            {
              "type": "Input.Date",
              "id": "dueDate"
            },
            {
              "type": "Input.Text",
              "id": "comment",
              "placeholder": "Add a comment",
              "isMultiline": true
            }
          ],
          "actions": [
            {
              "type": "Action.Submit",
              "title": "OK this is very very very long long text and it should go out"
            }
          ],
          "schema": "http://adaptivecards.io/schemas/adaptive-card.json"
        }
      },
      {
        "type": "Action.OpenUrl",
        "title": "View",
        "url": "{viewUrl}"
      }
    ],
    "schema": "http://adaptivecards.io/schemas/adaptive-card.json",
    "version": "1.0"
  },
  "data": {
    "title": "Publish Adaptive Card Schema",
    "description": "Now that we have defined the main rules and features of the format, we need to produce a schema and publish it to GitHub. The schema will be the starting point of our reference documentation.",
    "creator": {
      "name": "Matt Hidinger",
      "profileImage": "https://pbs.twimg.com/profile_images/3647943215/d7f12830b3c17a5a9e4afcc370e3a37e_400x400.jpeg"
    },
    "createdUtc": "2017-02-14T06:08:39Z",
    "viewUrl": "https://adaptivecards.io",
    "properties": [
      {
        "key": "Board",
        "value": "Adaptive Cards"
      },
      {
        "key": "List",
        "value": "Backlog"
      },
      {
        "key": "Assigned to",
        "value": "Matt Hidinger"
      },
      {
        "key": "Due date",
        "value": "Not set"
      }
    ]
  }
}
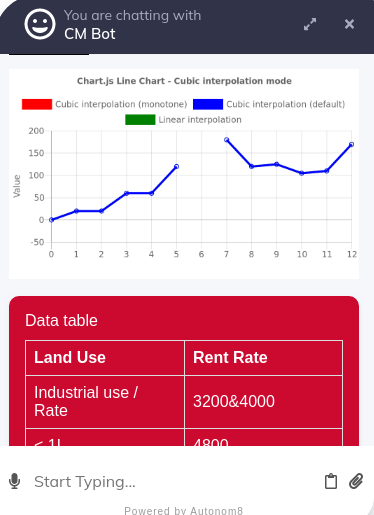
Chart
Step 1: While creating a chart, we need to add the "JSON" file in the Raw Payload.
{
  "type": "line",
  "data": {
    "labels": [
      "0",
      "1",
      "2",
      "3",
      "4",
      "5",
      "6",
      "7",
      "8",
      "9",
      "10",
      "11",
      "12"
    ],
    "datasets": [
      {
        "label": "Cubic interpolation (monotone)",
        "data": "datapoints",
        "borderColor": "red",
        "backgroundColor": "rgba(0, 0, 0, 0)",
        "fill": false,
        "cubicInterpolationMode": "monotone"
      },
      {
        "label": "Cubic interpolation (default)",
        "data": [
          0,
          20,
          20,
          60,
          60,
          120,
          "NaN",
          180,
          120,
          125,
          105,
          110,
          170
        ],
        "borderColor": "blue",
        "backgroundColor": "rgba(0, 0, 0, 0)",
        "fill": false
      },
      {
        "label": "Linear interpolation",
        "data": [
          0,
          20,
          20,
          60,
          60,
          120,
          "NaN",
          180,
          120,
          125,
          105,
          110,
          170
        ],
        "borderColor": "green",
        "backgroundColor": "rgba(0, 0, 0, 0)",
        "fill": false,
        "lineTension": 0
      }
    ]
  },
  "options": {
    "responsive": true,
    "title": {
      "display": true,
      "text": "Chart.js Line Chart - Cubic interpolation mode"
    },
    "tooltips": {
      "mode": "index"
    },
    "scales": {
      "xAxes": [
        {
          "display": true,
          "scaleLabel": {
            "display": true
          }
        }
      ],
      "yAxes": [
        {
          "display": true,
          "scaleLabel": {
            "display": true,
            "labelString": "Value"
          },
          "ticks": {
            "suggestedMin": -10,
            "suggestedMax": 200
          }
        }
      ]
    }
  }
}
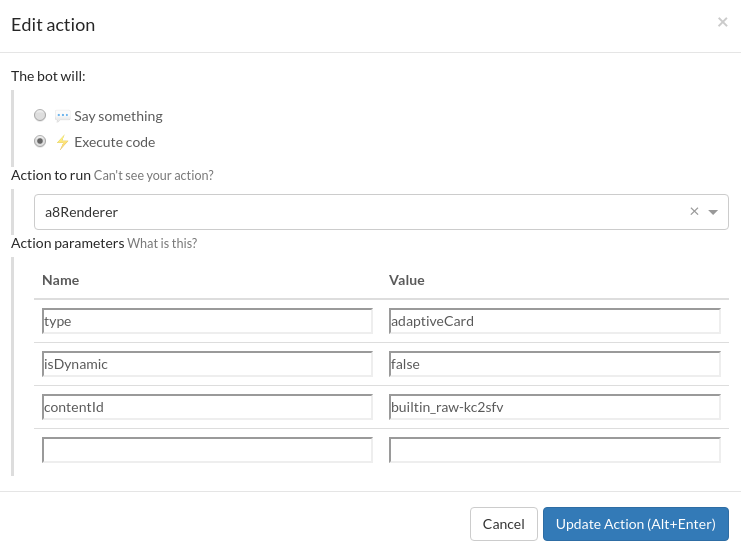
Step 2: After creating the Raw Payload, we need to create a flow. In the flow, select Execute code. A text box will appear below. Select a8Renderer and type the required name and value.
For reference the sample options are,
type: chart (The value is based on the name that was given in the Raw Payload)
isDynamic: false
contentId: builtin_raw-AIHrN0h (We can get the contentId value from the Raw Payload that we have created in Payload)

Output
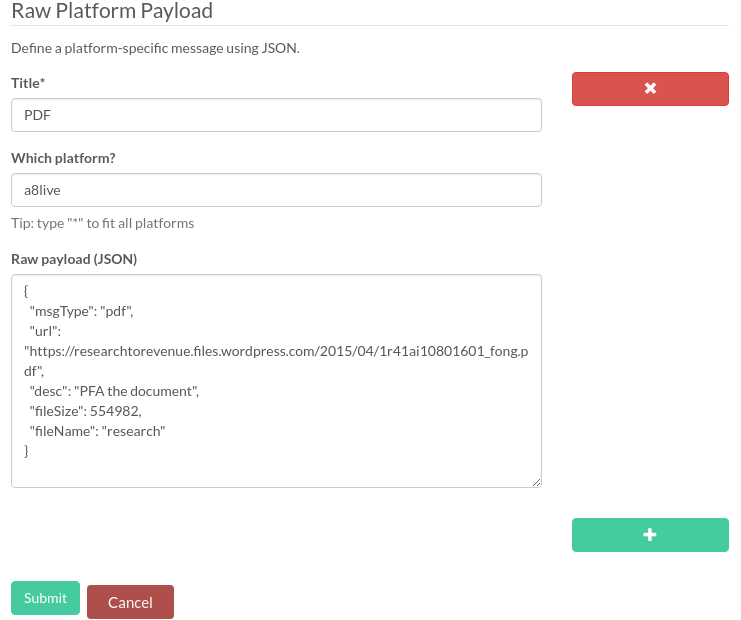
PDF
Step 1: While creating a PDF, we need to add the "JSON" file in the Raw Payload.
{
  "msgType": "pdf",
  "url": "https://researchtorevenue.files.wordpress.com/2015/04/1r41ai10801601_fong.pdf",
  "desc": "PFA the document",
  "fileSize": 554982,
  "fileName": "research"
}
Step 2: After creating the Raw Payload we need to create a flow. In the flow, select Execute code. A text box will appear below. Select a8Renderer and type the required name and value.
For reference the sample options are,
type: pdf (The value is based on the name that was given in the Raw Payload)
isDynamic: false
contentId: builtin_raw-GirwTd (We can get the contentId value from the Raw Payload that we have created for Image)

Output

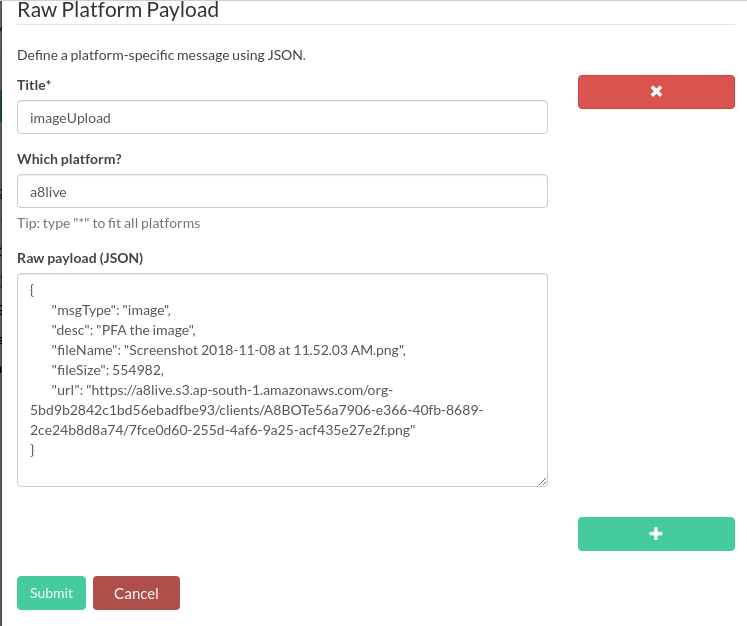
Image
Step 1: While creating an Image, we need to add the "JSON" file in the Raw Payload.
{
    "msgType": "image",
    "desc": "PFA the image",
    "fileName": "Screenshot 2018-11-08 at 11.52.03 AM.png",
    "fileSize": 554982,
    "url": "https://a8live.s3.ap-south-1.amazonaws.com/org-5bd9b2842c1bd56ebadfbe93/clients/A8BOTe56a7906-e366-40fb-8689-2ce24b8d8a74/7fce0d60-255d-4af6-9a25-acf435e27e2f.png"
}
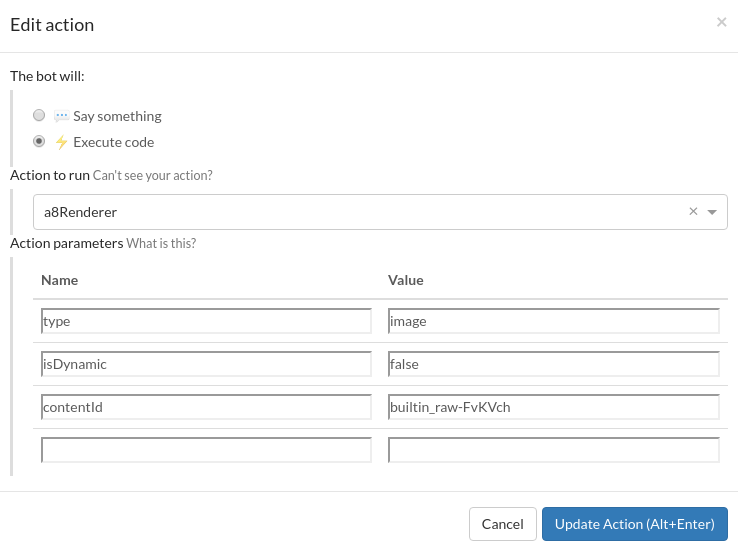
Step 2: After creating the Raw Payload, we need to create a flow. In the flow, select Execute code. A text box will appear below. Select a8Renderer and type the required name and value.
For reference the sample options are,
type: image (The value is based on the name that was given in the Raw Payload)
isDynamic: false
contentId: builtin_raw-FvKVch (We can get the contentId value from the Raw Payload that we have created for Image)
Output

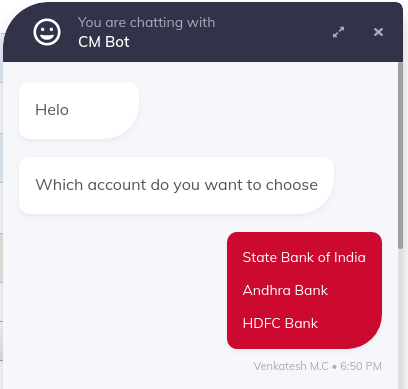
Oauth
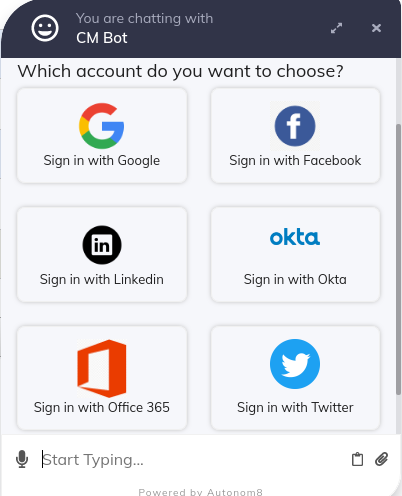
Step 1: While creating an Oauth, we need to add the "JSON" file in the Raw Payload.
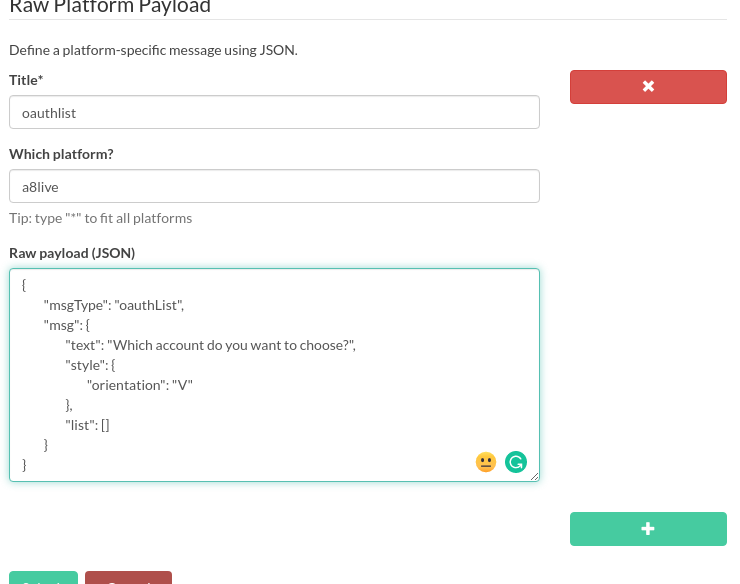
{
    "msgType": "oauthList",
    "msg": {
        "text": "Which account do you want to choose?",
        "style": {
            "orientation": "V"
        },
        "list": []
    }
}
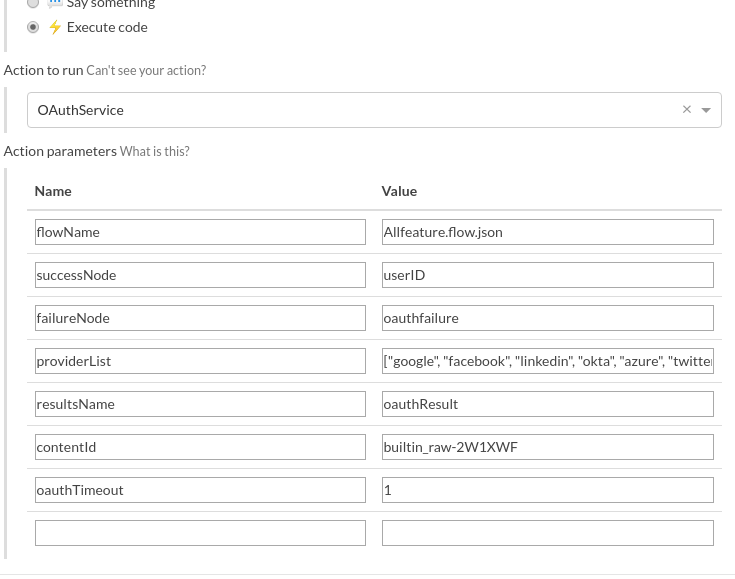
Step 2: After creating the Raw Payload, we need to create a flow. In the flow, select Execute code. A text box will appear. Select OAuthService and type the required name and value.
For reference the sample options are,
flowName: Allfeature.flow.json(The Flow which we use)
successNode: userID(Node name that has the the success message)
failureNode: oauthfailure(Node name that has the the failure message)
providerList: ["google", "facebook", "linkedin", "okta", "azure", "twitter"]
resultsName: oauthResult(The resultsName is used to get the user mail-ID, displayName, and pId(Provider-ID) with the help of OAuthParser)
contentId: builtin_raw-2W1XWF
oauthTimeout: 1(Average Waiting time for the user to give some responce)
Step 3: After creating an OAuthService, we need to set the Wait response for a minute in OnReceive as default behavior.
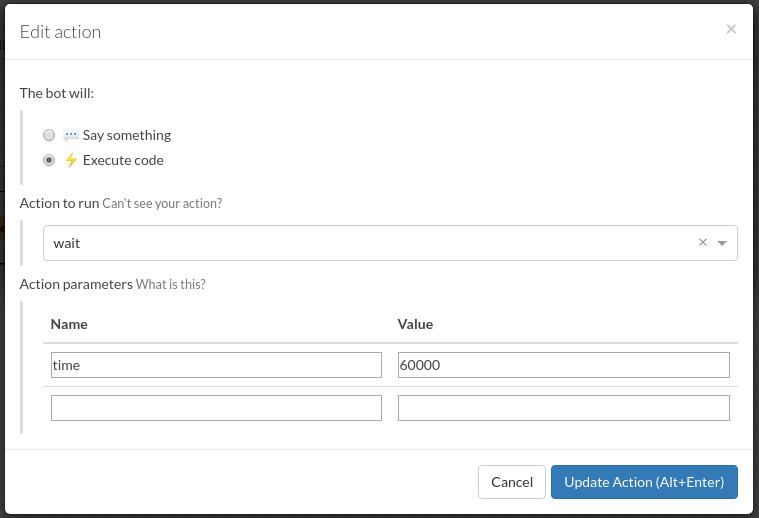
-b41ecbbdbabca0b8078c2371262641f5.png)
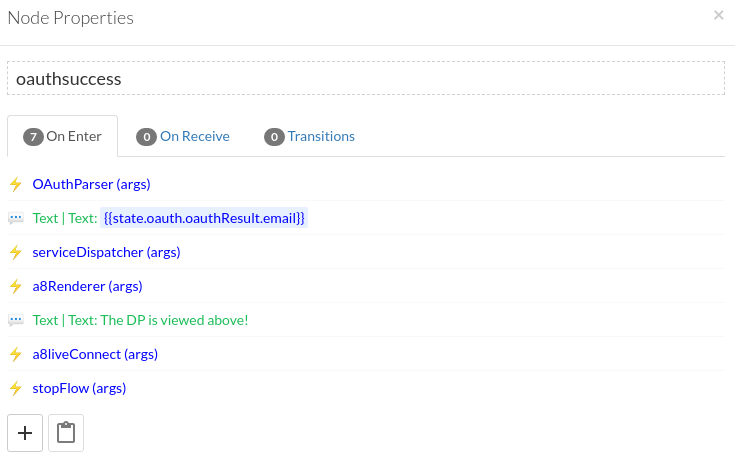
Step 4: To print the user mail id, displayName and PID of the user, you have to select OAuthParser in Execute code on the Success node.
Step 5: Follow the format {{state.oauth.oauthResult.email}}. This format is used to print the user mail ID.
Step 6: To display the pId(Provider-ID), we need to follow {{state.oauth.oauthResult.pId}}.
Step 7: To print the given displayName we need to follow {{state.oauth.oauthResult.displayName}}.
Output
Autocomplete
Step 1: While creating an Autocomplete, we need to add the "JSON" file in the Raw Payload.
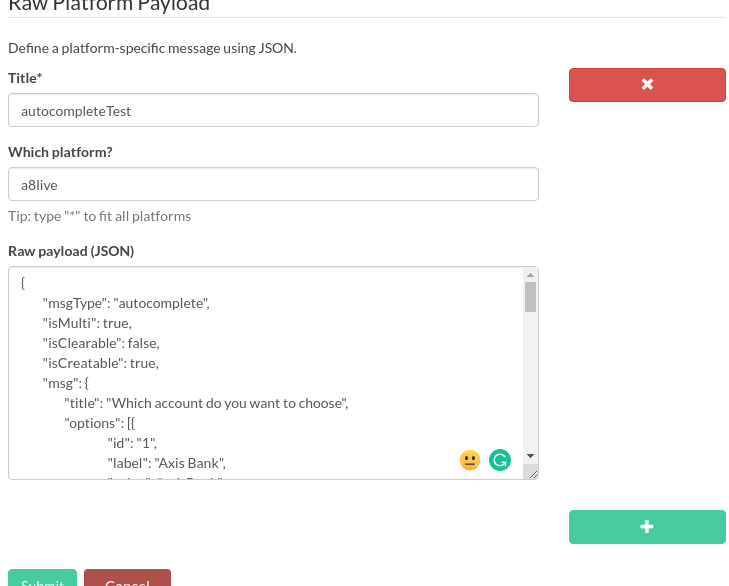
{
    "msgType": "autocomplete",
    "isMulti": true,
    "isClearable": false,
    "isCreatable": true,
    "msg": {
        "title": "Which account do you want to choose",
        "options": [{
                "id": "1",
                "label": "Axis Bank",
                "value": "axisBank"
            },
            {
                "id": "2",
                "label": "Canara Bank",
                "value": "canaraBank"
            },
            {
                "id": "3",
                "label": "State Bank of India",
                "value": "sbi"
            },
            {
                "id": "4",
                "label": "Andhra Bank",
                "value": "andhraBank"
            },
            {
                "id": "5",
                "label": "HDFC Bank",
                "value": "hdfcBank"
            },
            {
                "id": "6",
                "label": "A Bank",
                "value": "aBank"
            },
            {
                "id": "7",
                "label": " Canara Bank",
                "value": "cBank"
            },
            {
                "id": "8",
                "label": "Kodak Bank",
                "value": "K Bank"
            },
            {
                "id": "9",
                "label": "Andhra Bank",
                "value": "AP Bank"
            },
            {
                "id": "10",
                "label": "Britist Bank",
                "value": "bBank"
            },
            {
                "id": "11",
                "label": "Panjab Bank",
                "value": "PBank"
            }
        ]
    }
}
Step 2: After creating a Raw Payload, we need to create a flow. In the flow, select Execute code. A text box will appear. Select a8Renderer and type the required name and value.
For reference the sample options are,
type: chart (The value is based on the name that was given in the Raw Payload)
isDynamic: false
contentId: builtin_raw-4IbHAl (We can get the contentId value from the Raw Payload that have been created in Payload)

Step 3: In the Transition tab, we need to set the created SimpleChoice. Click on the + icon to open the transition tab and we have to add the raw expressions for each choice in our simple choice form.
The sample raw expressions are given here for your reference. The ID, value, and label are pointing out the value that was given in the Raw Payload.
event.raw.payload.msg.filter(e => e.id == '3' && e.value == 'sbi' && e.label: 'State Bank of India').length > 0
Output