DMN Evaluation
Working with DMN
To begin working with DMN in the DMN Hub, follow these steps:
- Navigate to the DMN List screen.
- And, click on the newly created DMN.

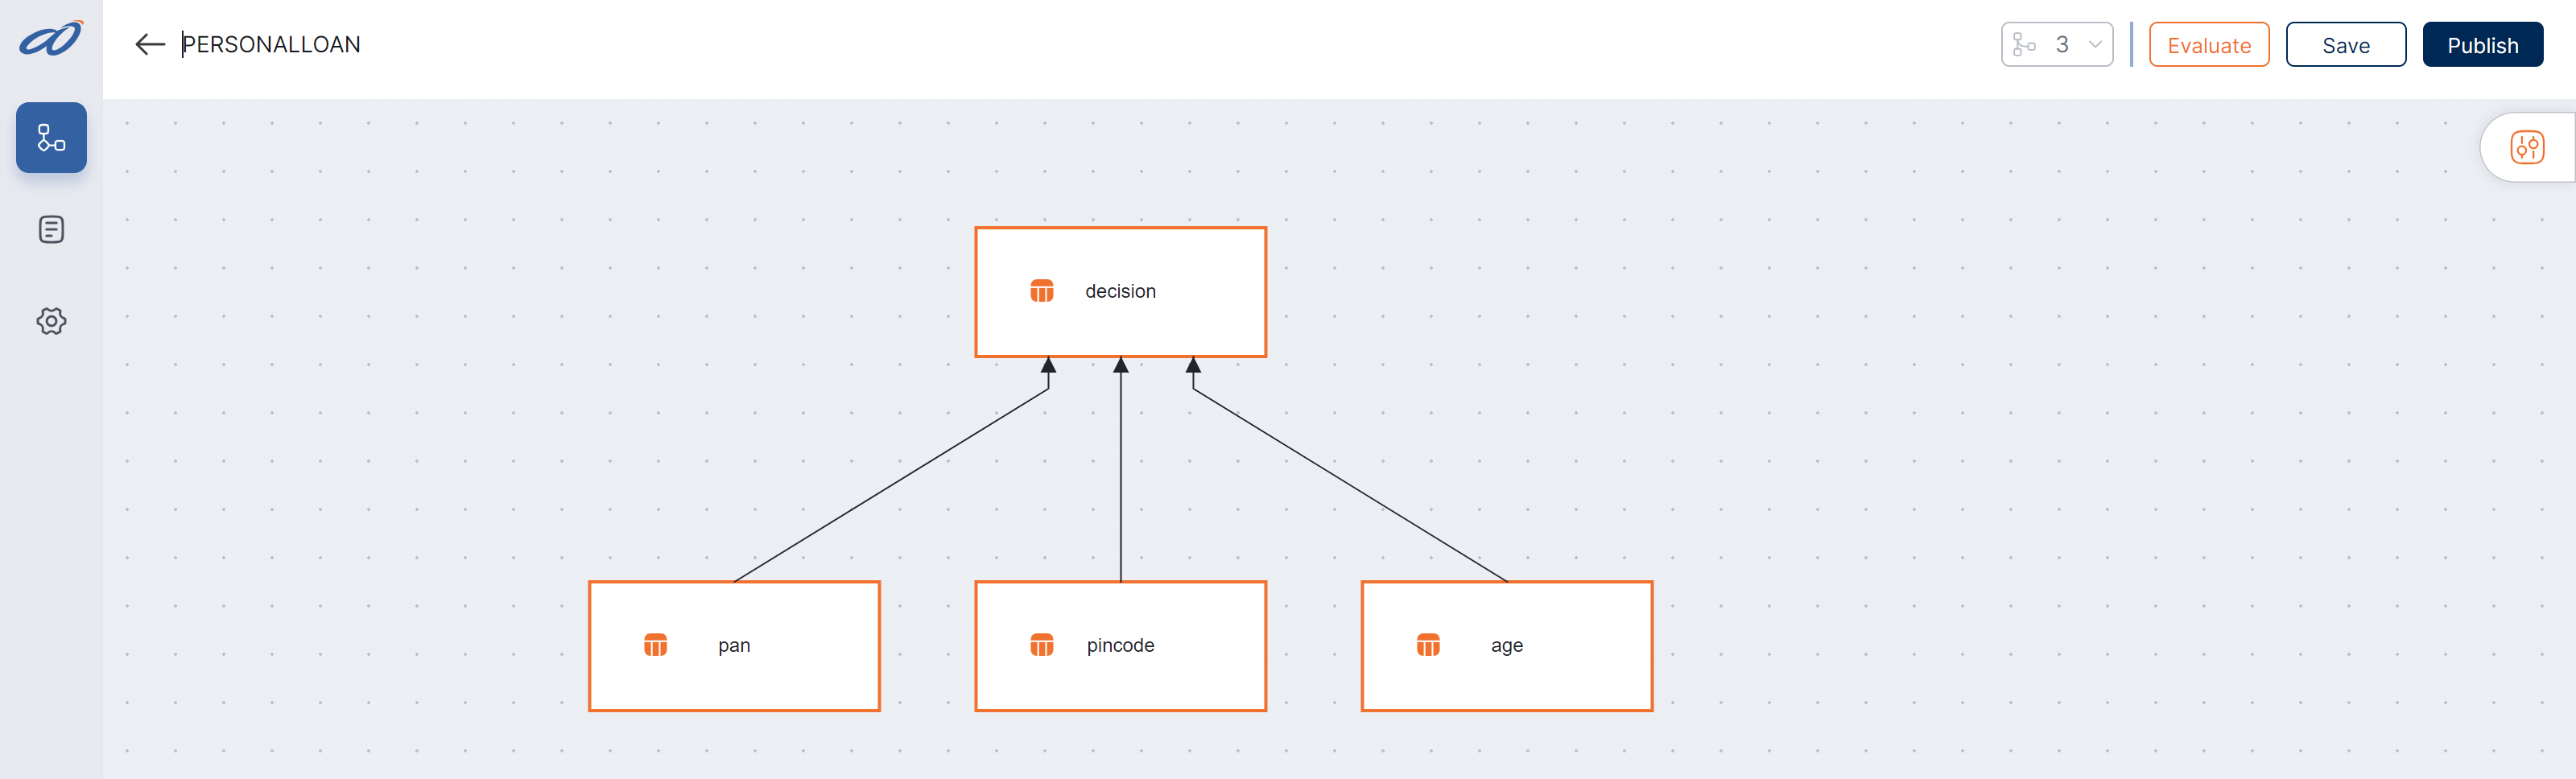
It opens the DMN Viewer. (A Decision Node is placed by default.)

Parent Node
Note: The first node is your Parent Node. All other nodes must flow towards it.
- Add your desired set of nodes.

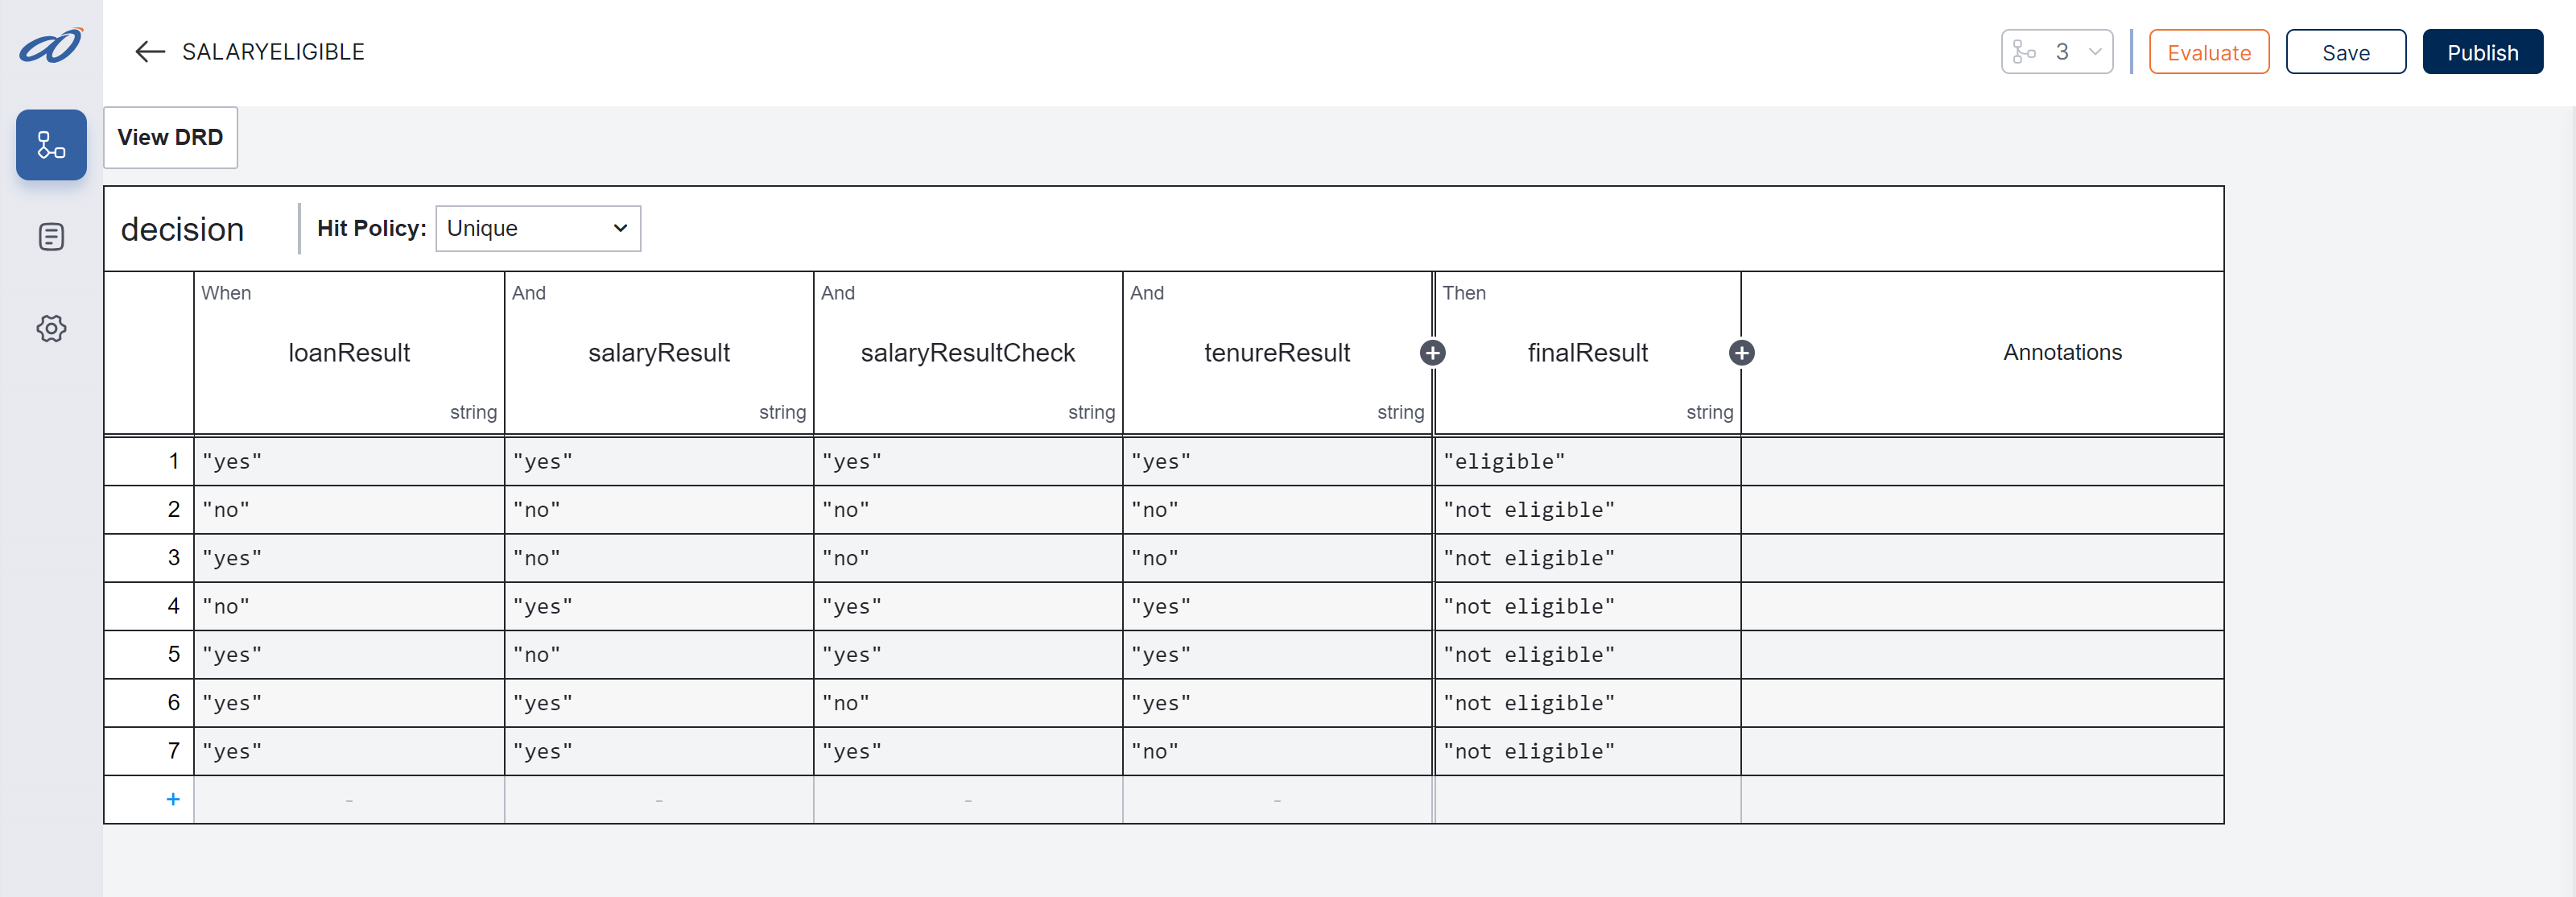
Decision Tables
- Click on the Table Icon on the respective node to open its decision table.
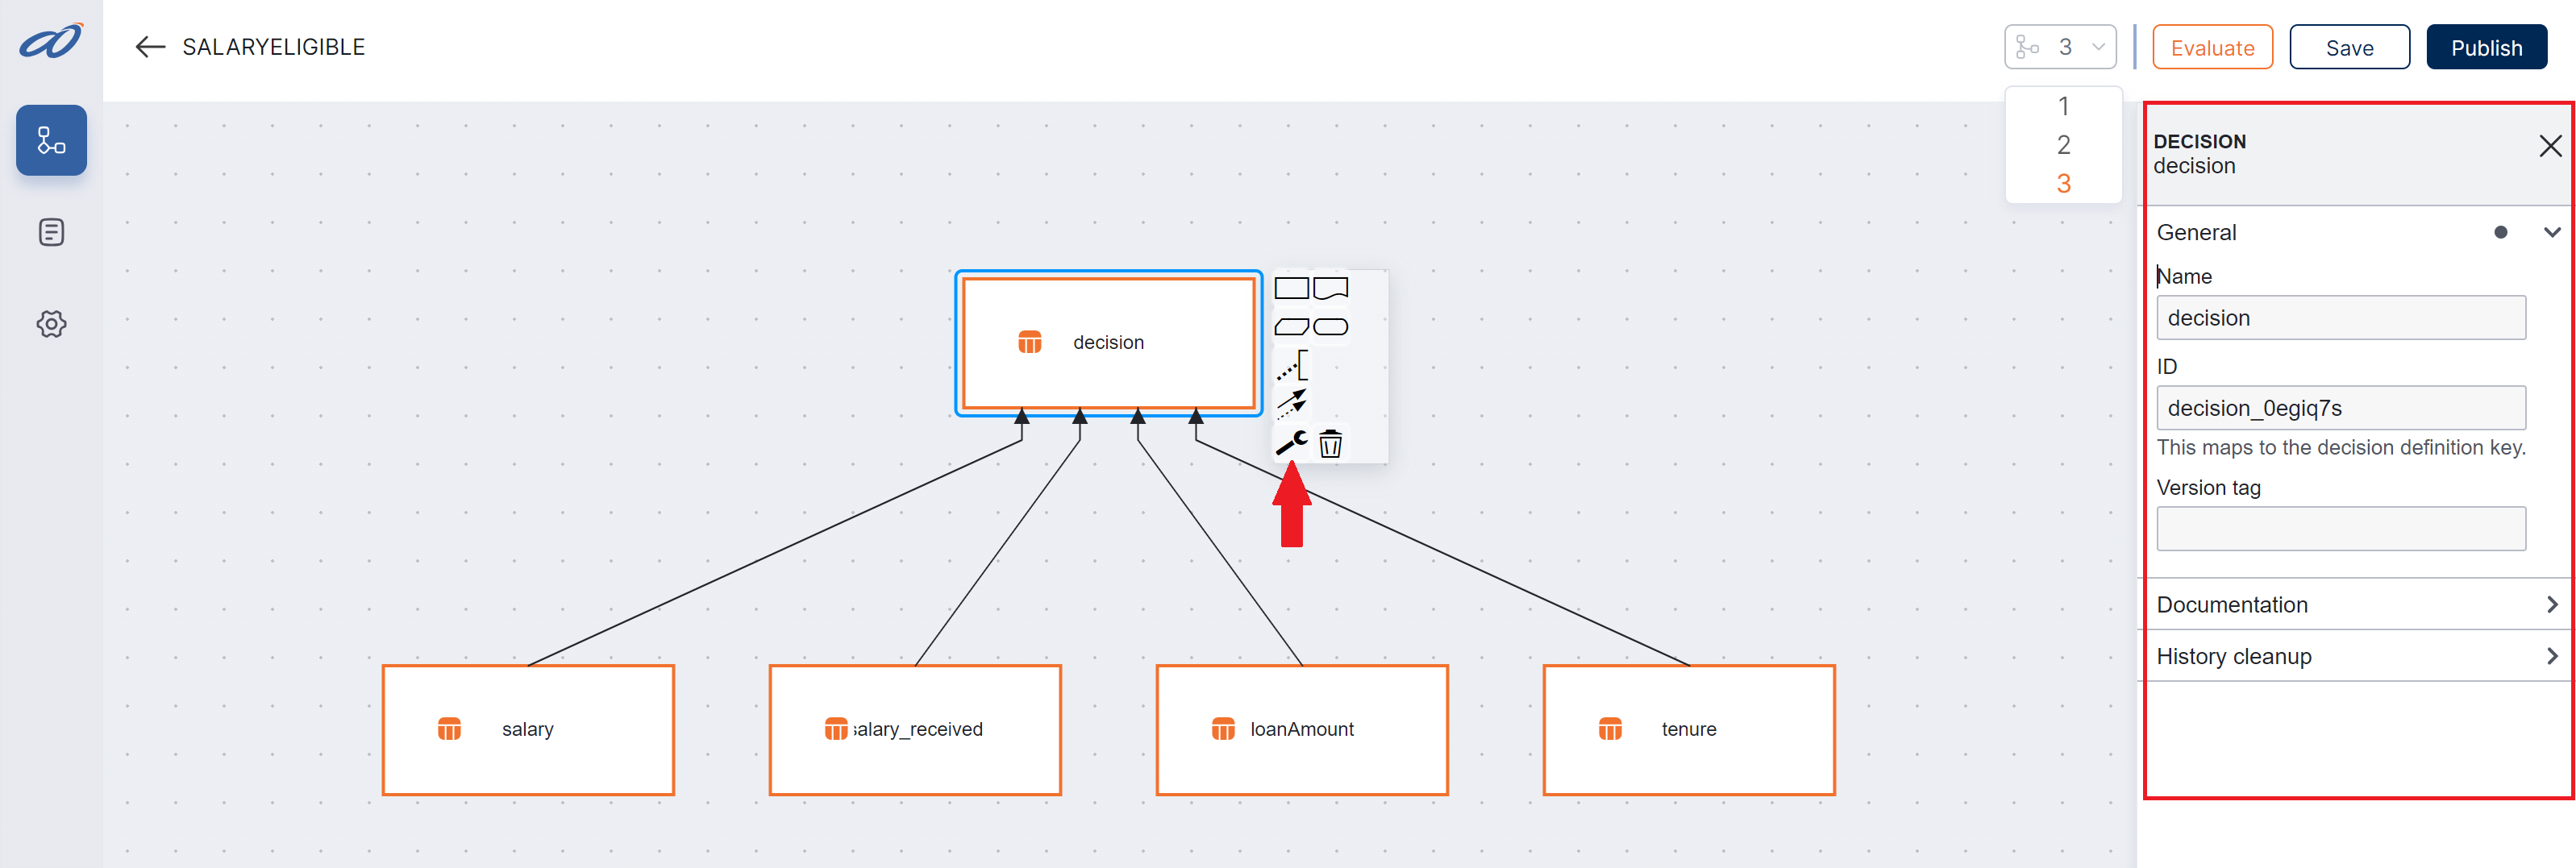
Node Properties
- To open the Node Properties, Click on the node.
- Select the Spanner Icon.
It opens the properties panel to the right.
Save and Evaluate
To Save:
- Click on the Save button to confirm your DMN.

Note: You must save before you can evaluate the DMN.
To Evaluate:
- Input the values of the variables in their respective fields.
- Click the Evaluate button.
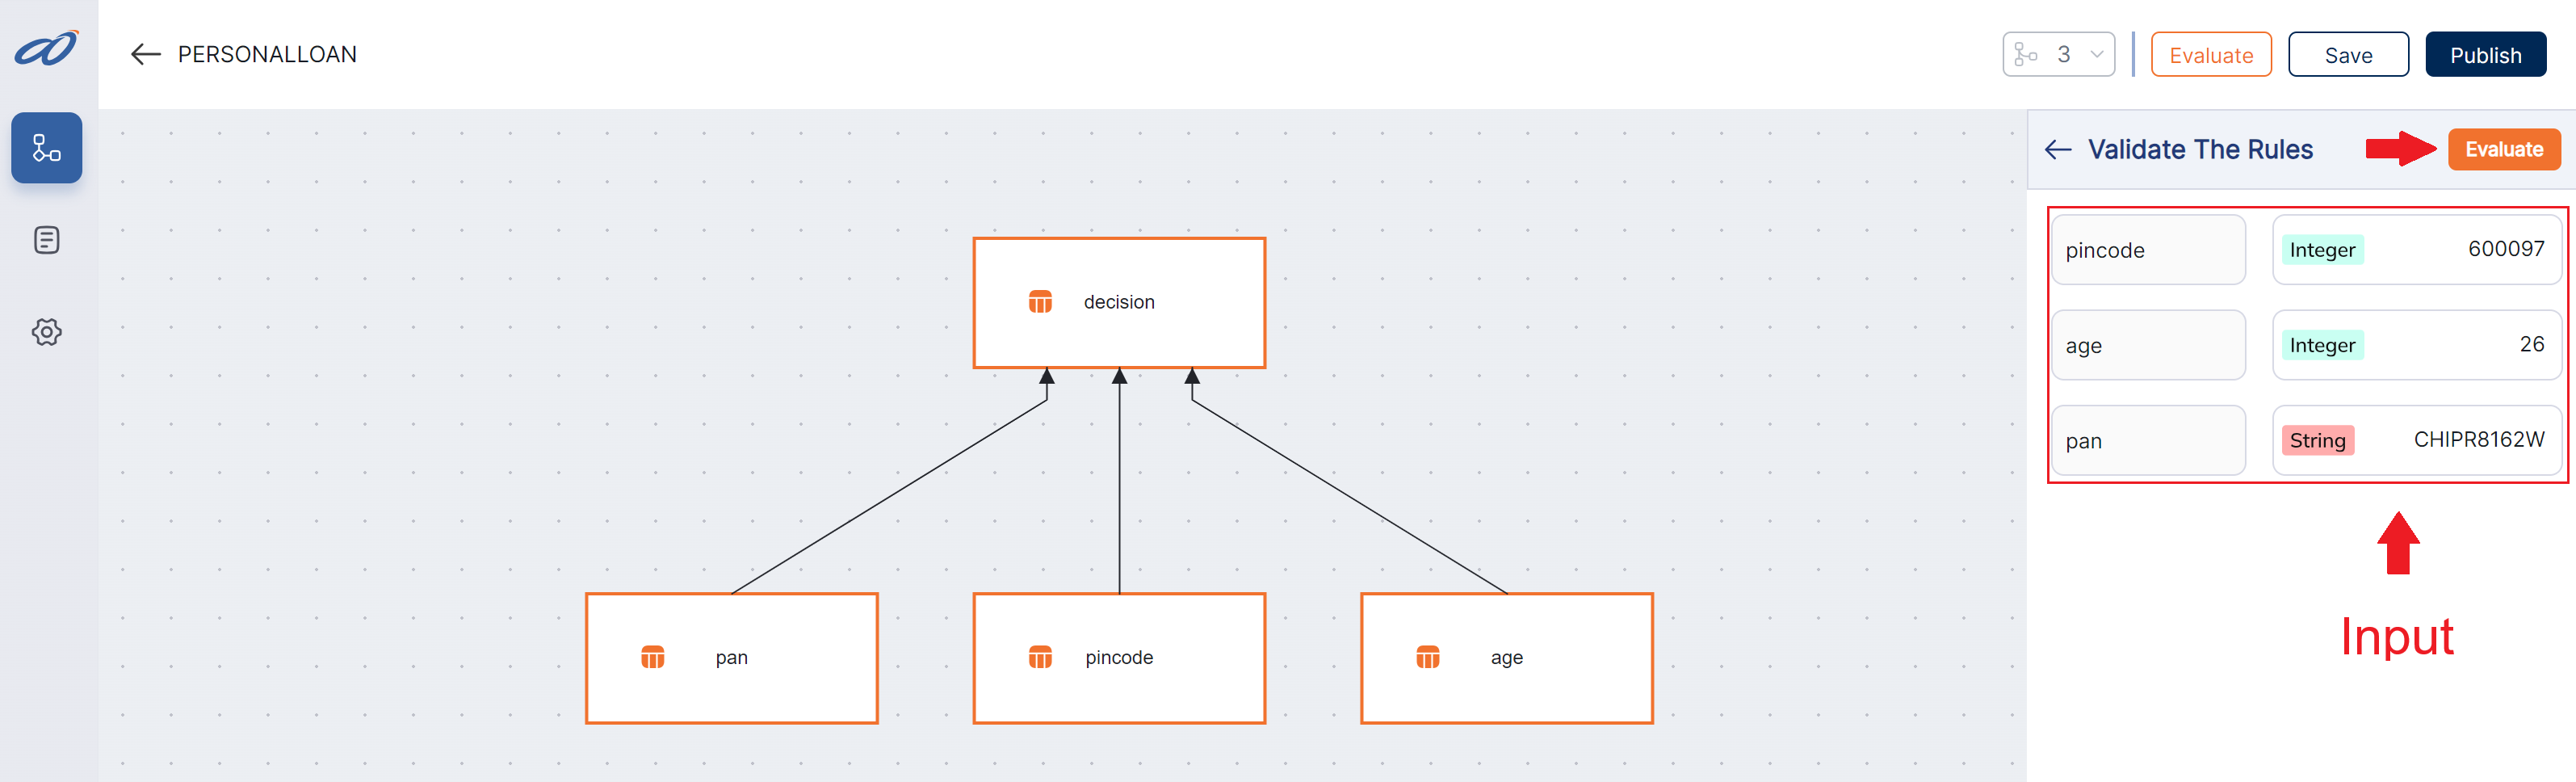
- The output will be displayed in the Results section.

Publishing and Versioning
Publishing:
- To publish your DMN, click the Publish button.
Note: Every time you "publish," a new Version is created.

Versioning:
- You can switch between the versions seamlessly.
- Further, you can manage the versions by setting them as Active or Inactive manually.

By manually deactivating a version, you skip it when Evaluating via A8Studio.
tip
Only active versions are available for DMN evaluation.