Astro
Astro Flow is an intricate user interface (UI) designed for creating and managing databases.
The Astro GUI (graphical user interface) enables you to quickly create, manage, and delete the connections, schemas, tables, and records of your database (currently supports Postgres). This intuitive interface streamlines the process of working with Astro and provides a visual representation of the data structure.
With Astro, users can connect their own database and use them within A8Studio.
Unlike A8Data, Astro users can establish direct connections to their external database.
Accessing Astro in Flow
- Click on the Astro icon.
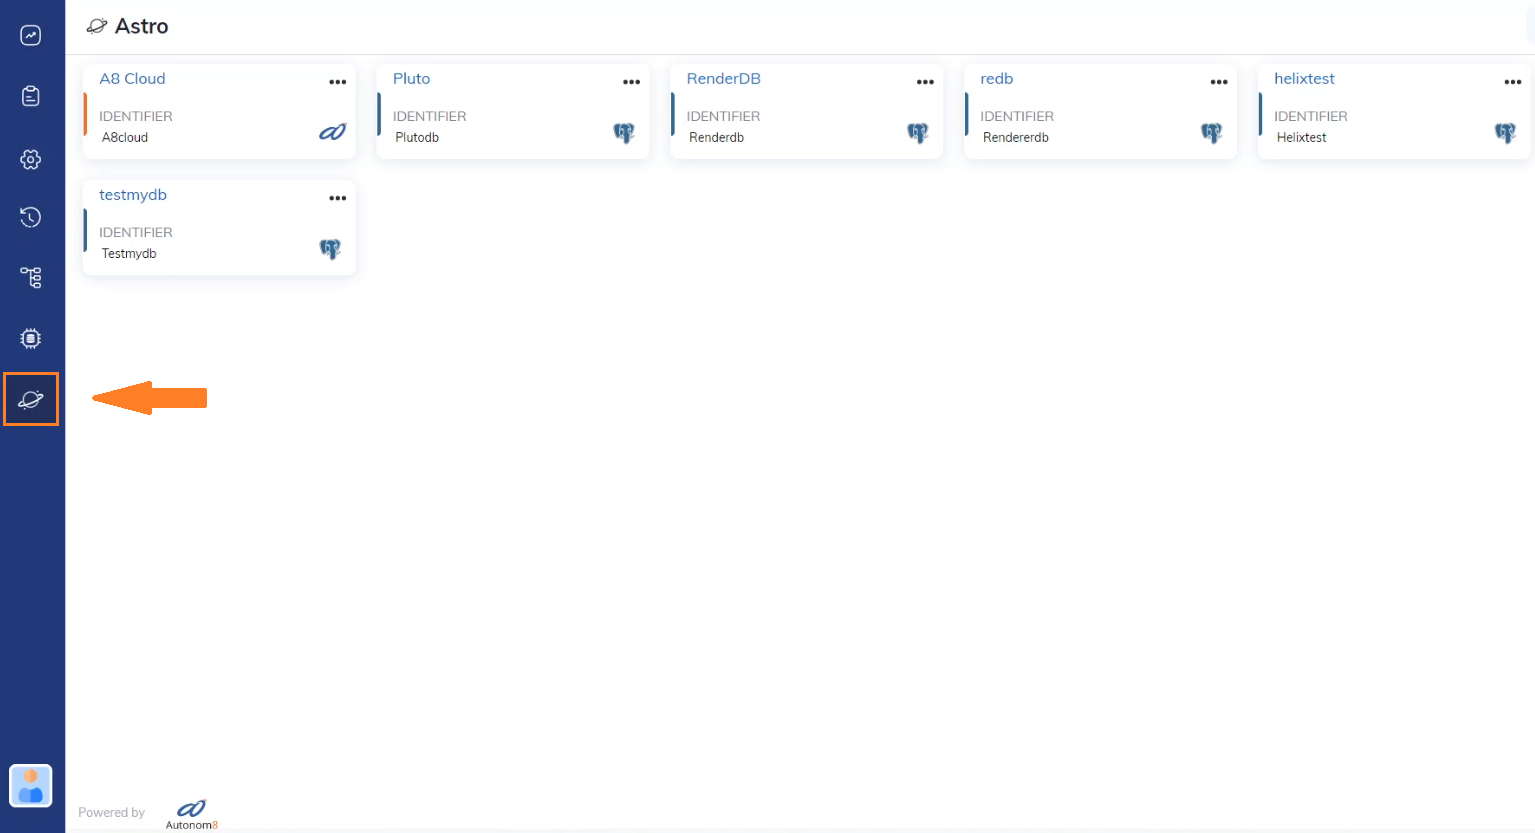
It displays all database connections associated with the Profile.
Note: A default A8 Cloud "public" database will be set up by A8 Team. However, you can connect your database and use it in A8Studio by following these steps.
Database Connection and Management in the Dev Flow
To establish a database connection in the development environment, follow these steps:
Connecting to a Database
Step 01: To connect a database, Click the "Plus" icon at the bottom-right corner of the Astro screen.
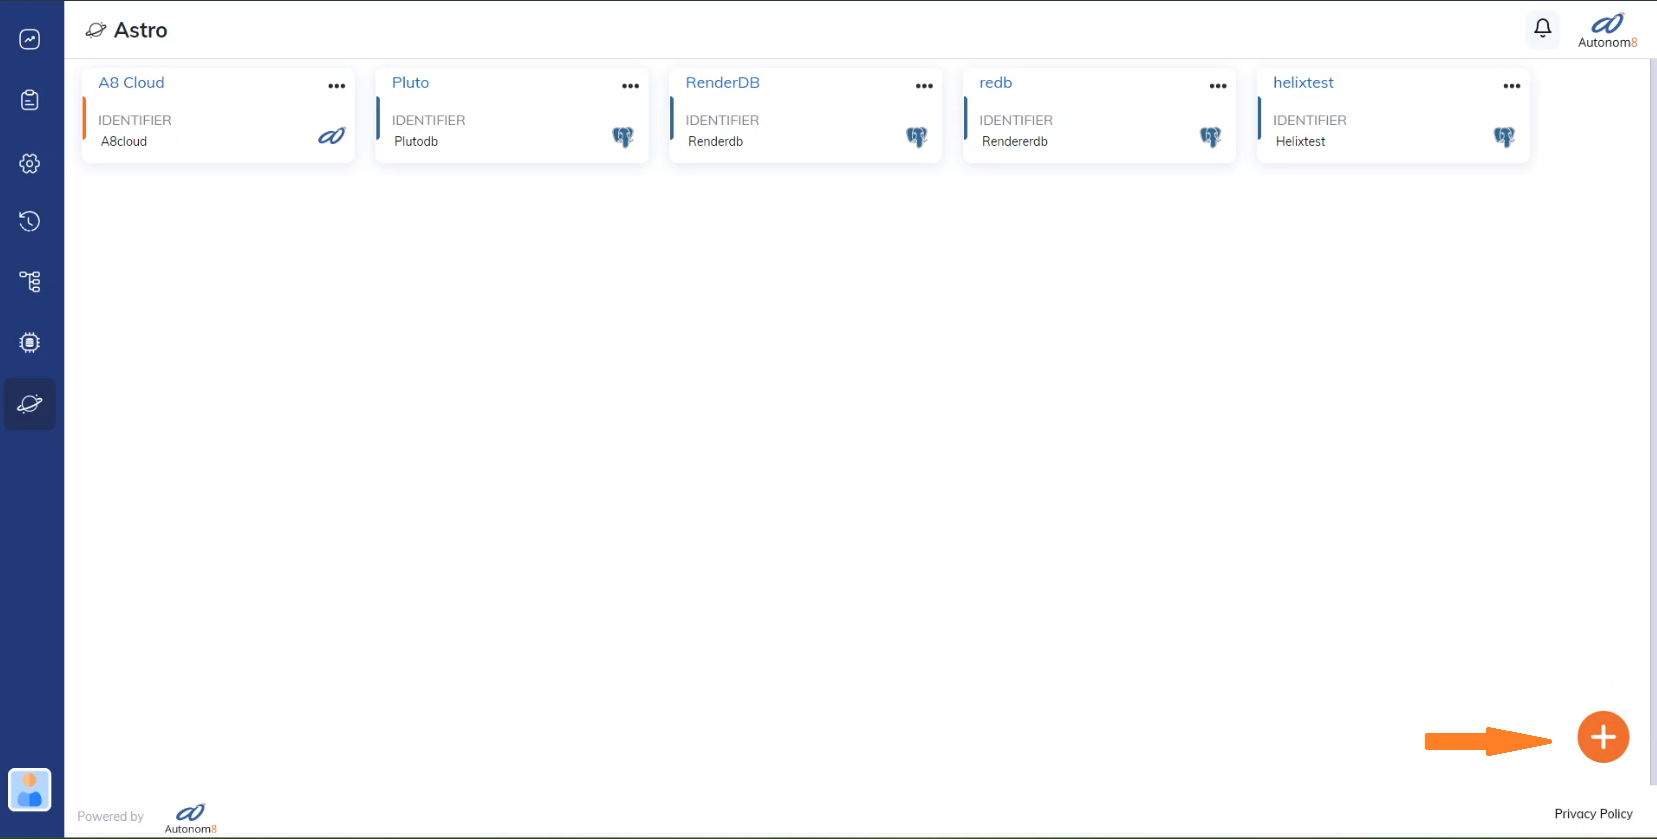
The "Create Astro Connection" window will pop up.
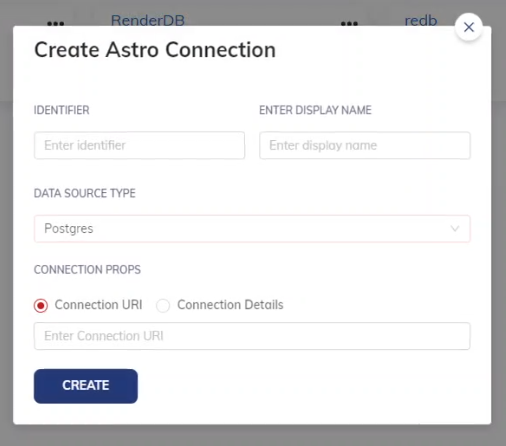
Step 02: Enter details in their respective fields.
Identifier: It will be the name used to refer to the database while accessing it from A8Studio.
a8astro.connect("testmydb")(replace 'testmydb' with the Identifier string of your database).Enter Display Name: It will be the "Display Name" of the database in the Flow environment.
Select the Data Source Type: Currently supports only "Postgres".
Connection Props:
- Enter the Connection URI string to directly connect to the database.
- Or provide the necessary Connection Details such as "Host", "Port", "UserName", "Password", and "Database".
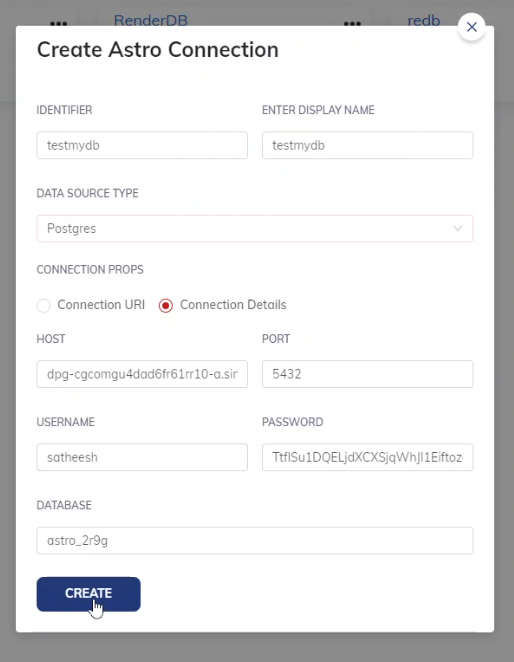
Step 03: And click on CREATE.
Once the connection is established, the database can be viewed in the Astro Dashboard.
With Astro, there is no need for a third-party database manager to Edit, Update, or Delete data. All changes can be performed within the Astro Dashboard.
To modify the existing database or remove it entirely:
- Click on the three dots on the specific database "card".
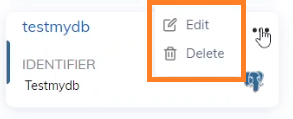
From the dropdown menu:
- Select the "Edit" option to make changes to the database details.
- Alternatively, choose the "Delete" option to remove the database completely.
- Type in the respective connection name (case and space sensitive), and click on the
Deletebutton to confirm deleting the connection.
Managing the Database
To access the database, follow these steps:
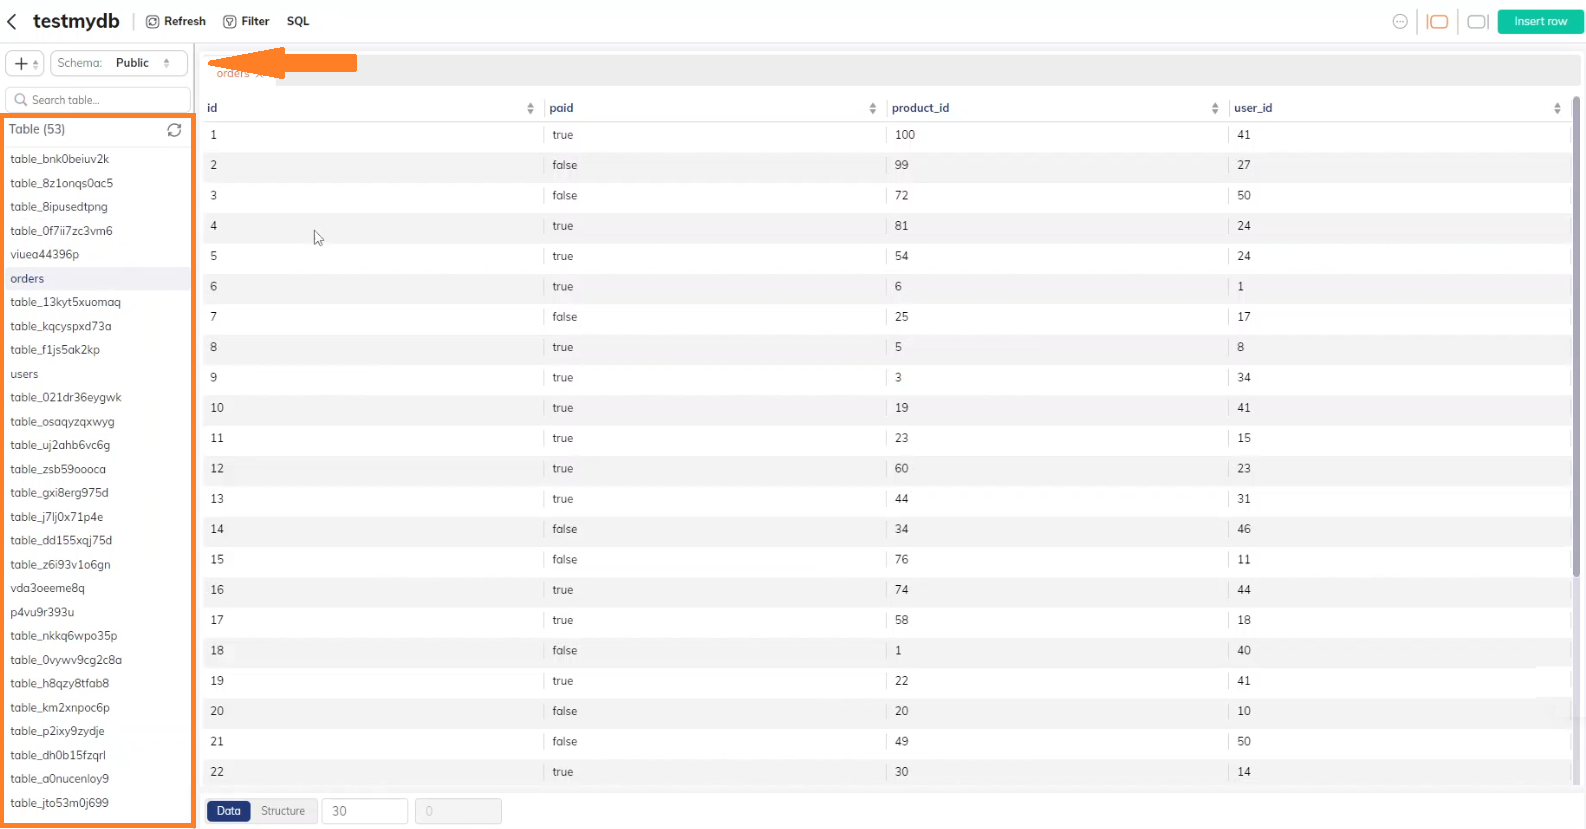
- Click on the database "card" from the Astro Dashboard.

The database dashboard features the following elements:
- Refresh Buttons
- Filter
- Raw SQL Editor
- Right - Icons
- By default, the "Public" Schema is selected. The available "Tables" for this schema are displayed on the side-menu.
Note: The "Schema List" for the database can be found in the dropdown at the top of the side-menu
Creating a Schema
Select "New Schema" from the dropdown (a pop-up window will open).
- To create a new schema, click on the "Plus" button and choose "New Schema" from the dropdown menu.
- Similarly, you can create a table by selecting "New Table" from the same dropdown menu.
Next, follow these steps:
- Enter the desired SCHEMA NAME.
- Click the
CREATEbutton to add your new schema to the current database.
- The newly added schema will now be available in the schema dropdown.
To switch to a different schema in the database management system:
- Click on the current Schema name. This should trigger a dropdown menu.
- From the dropdown, select the desired schema you want to switch to.
- Finally, click on the refresh button to load the tables associated with the newly selected schema.
Updating and Deleting a Schema
To Edit or Delete an existing Schema, click on the current Schema name. This action triggers the dropdown, which lists all the schemas available for the current database.
Editing a Schema
- To edit the schema, click the "Pen" icon.
(A window similar to the "Create new schema" window will pop-up.) - Here, you can change the name of the schema. Now, click the
Updatebutton to confirm the new name.
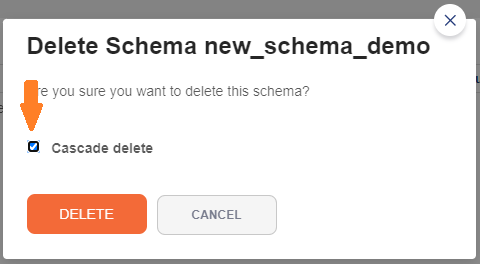
Deleting a Schema
- To delete the schema, click the "Bin" icon.
- (A confirmation window will pop-up). Click the
DELETEbutton to confirm the action, or clickCANCELto go back. - Optionally, you can check the "Cascade delete" box to have all references associated with this schema deleted as well.