Table
Creating a Table
Method 01: Manual
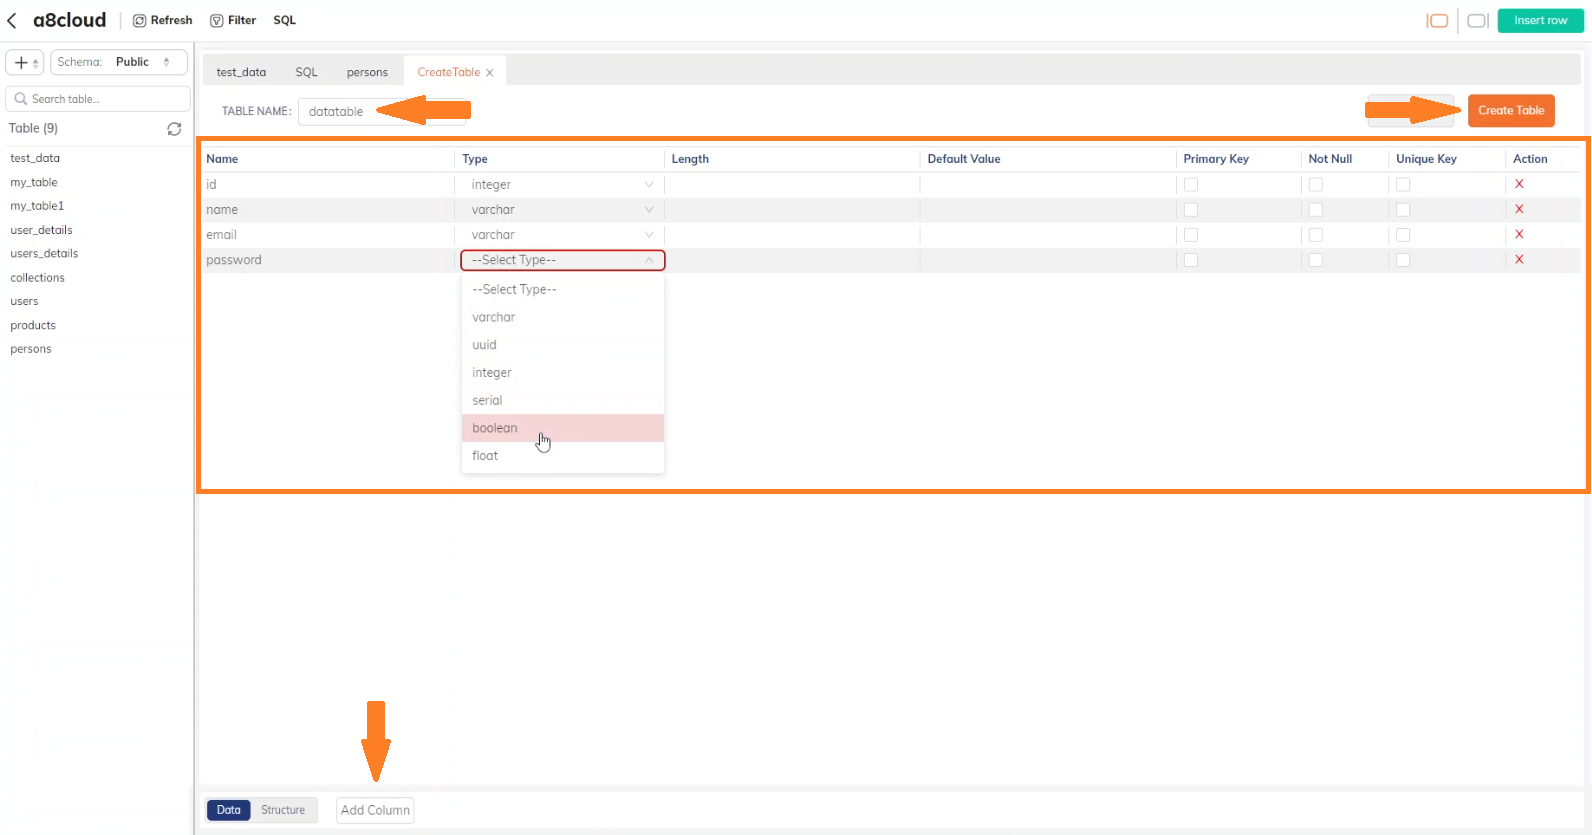
After selecting the "New Table" from the dropdown, follow these steps:
- Enter the desired TABLE NAME.
- Click the
Add Columnbutton to add a new column to the table; use it to have the desired number of columns. - Fill in the Name of the columns in the table.
- Select the column Type from a dropdown.
- Finally, click the
Create Tablebutton.
Method 02: Using SQL to Create a New Table
- Write a valid SQL query and click on the "Run Query" button to execute the query.
CREATE TABLE Persons (
    PersonID int,
    LastName varchar(255),
    FirstName varchar(255),
    Address varchar(255),
    City varchar(255)
);

-- This SQL query creates a table named 'Persons' with columns: 'PersonID' (int), 'LastName',
-- 'FirstName', 'Address', and 'City' (varchar(255)) to store string values of up to 255 characters.
Working with Tables
Once a table is created, you can interact with its features by following these steps:
![]()
Data
- The table allows you to toggle between ascending, descending, and default sorting orders with each click on a column header.

- The rows are loaded in batches (by default: 30 at a time). As you scroll to the bottom of the current set, the next set is automatically loaded.

Note: You have the option to adjust the number of rows displayed or updated by modifying the field at the bottom of the table.
- Lastly, the columns in the table are resizable and scrollable, allowing you to adjust their width to view the content effectively.
Structure
![]()
Clicking on "Structure" enters the "Column Definition" tab. (It is non-editable by default).
An alternate way to access the column definition tab:
- To edit, click on the three dots in the top-right corner.
- And select "Delete Table" from the dropdown.

Adding a Row
Method 01: Manual
To add a new row to a table in the database:
- Click on the "
Insert Row" button at the top-right of the screen.
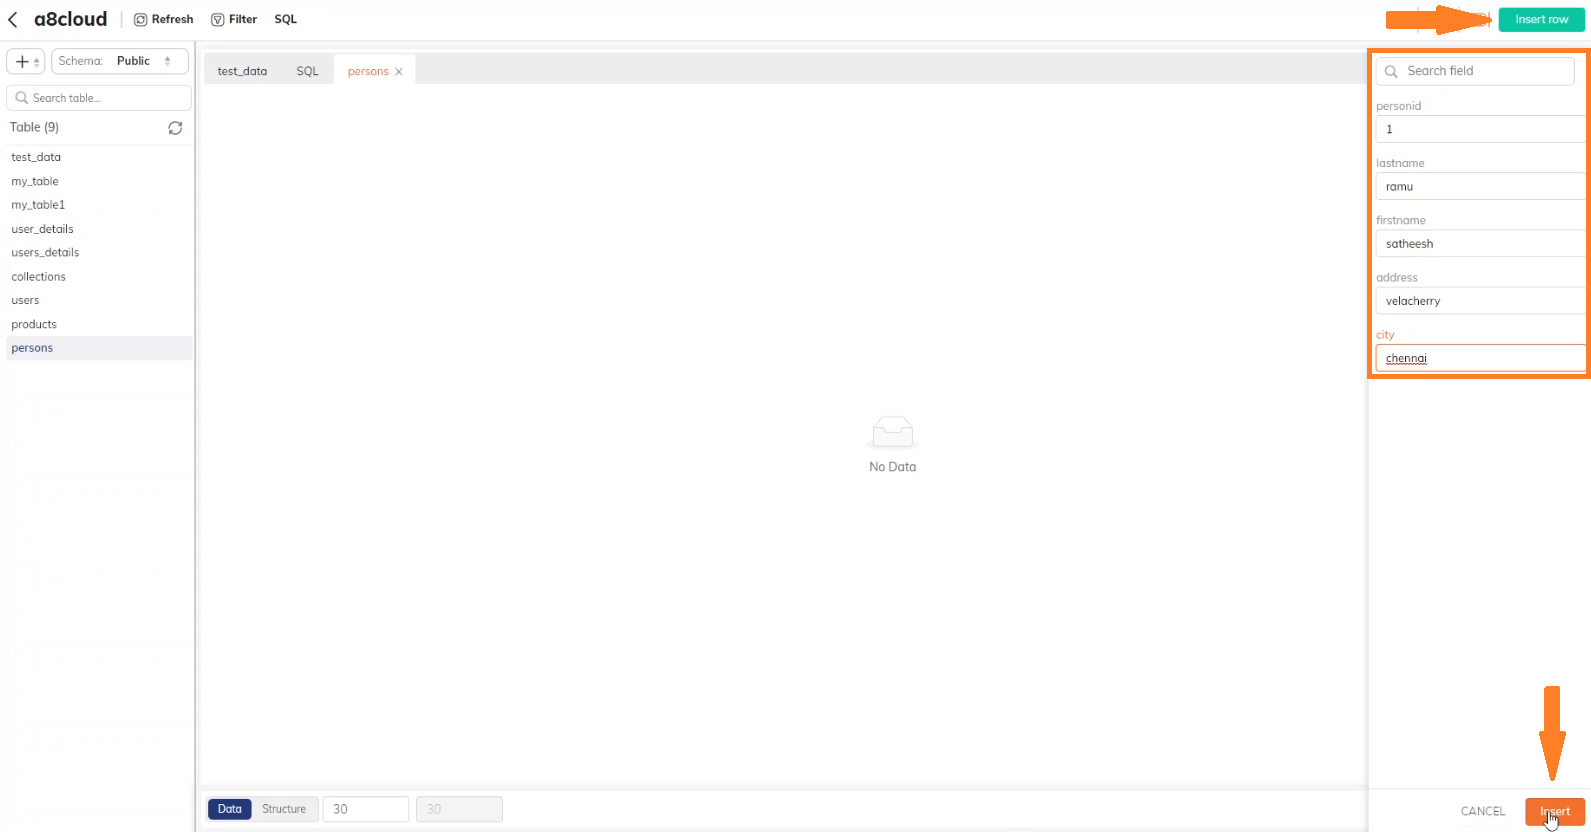
- Fill in the respective fields based on the available columns in the table.
- Once you have entered the values for the columns, click on the "Insert" button.

You will see the newly added row reflected in the table.
Method 02: Using SQL to Add a Row
The following SQL query Inserts a new row with the specific data into the table. It must be written within the SQL editor.
INSERT INTO persons (personid, lastname, firstname, address, city)
VALUES (2, 'Deo', 'John', '123 Main St', 'New York') returning *;
If there is any syntax error, you will receive an appropriate ERROR message.
When the "returning" syntax is misspelt.
![]()
Updating and Deleting a Row
- All fields in the row are editable.
- Some of the data can be stored as JSON. (When that's the case, the data will be a "String" than an "Object")
Note: The SQL editor can be used to write a query to edit the JSON.
Row Click
- On selecting a row, its data is opened to the right of the screen in a panel. (You can close it with
 )
)
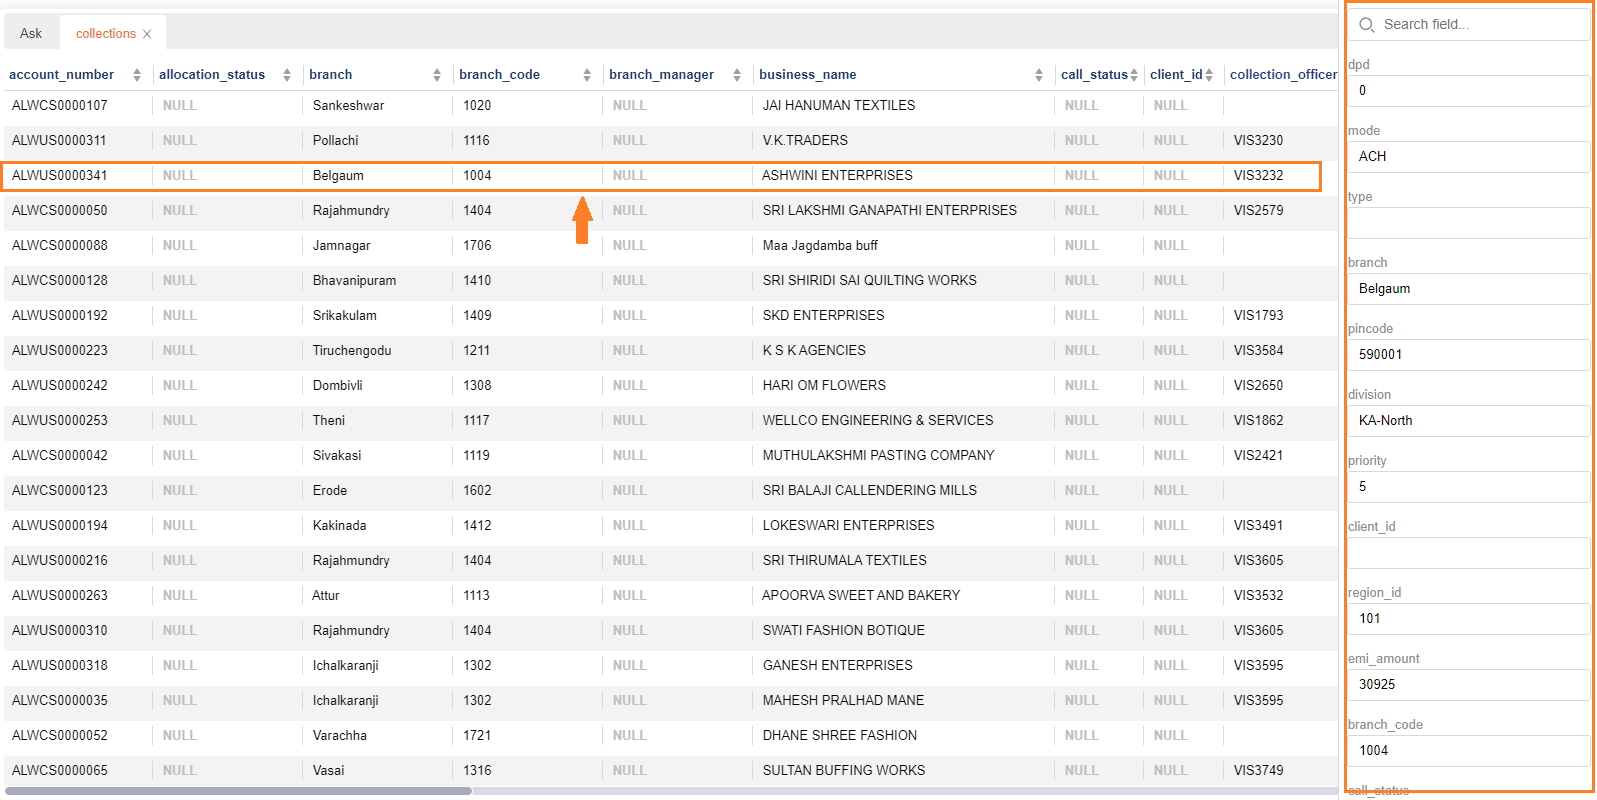
- You can update the values of its columns and click on "
Update" to store the data. - On clicking the "Update" button, you will see a message that indicates the "No. of rows affected" by your change. Or an error message with a description of the error.
Note: This panel has a "
Search" feature that enables you to find a field quickly.
Row Right-Click
By right-clicking on a specific row in the table, you have the option to either "Edit" or "Delete" them. It opens a context menu offering the respective options.

Edit
- Selecting the "Edit" option from the context menu allows you to modify the values similar to the Updating option.
Delete
To remove an entire row from the table: (This action will permanently remove the selected row from the table.)
- Right-click on the desired row to open the context menu.
- From the context menu, select the "Delete" option.