Assets
The key characteristic of an asset is its reusability.
What's An Asset?
An Asset in A8Studio is a collection of components that are grouped together as a single unit. Once an asset is created, it is stored in the "Assets Tab" for future use. Creating assets eliminates the need to recreate the same collection of components over and over again; instead, you can directly drop the assets with the pre-built set of components onto the forms - saving both time and effort.
Now, let's see how you can create an asset.
Creating An Asset
Step 01: Launch A8Studio
Step 02: Enter the Form Builder page. Enable CHECKOUT.
Step 03: Drag-and-drop the desired components (within a Container or Section), as you would for building a form.
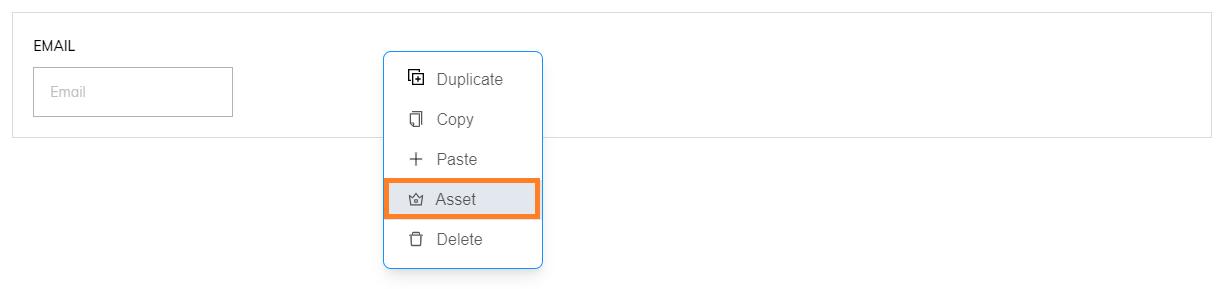
Step 04: Once you have the layout ready, "right-click" on the Container or Section and select the "Asset" (Crown) icon to designate it as an asset. The asset will now be available in the Assets Tab.
[Note: To view all the available assets, click on the "Assets Tab" (Folder icon).]
Using an Asset in the forms
1) Adding Assets Manually
Adding assets manually to A8Studio forms is as simple as adding any other component.
Step 01: Access the "Form Builder" screen.
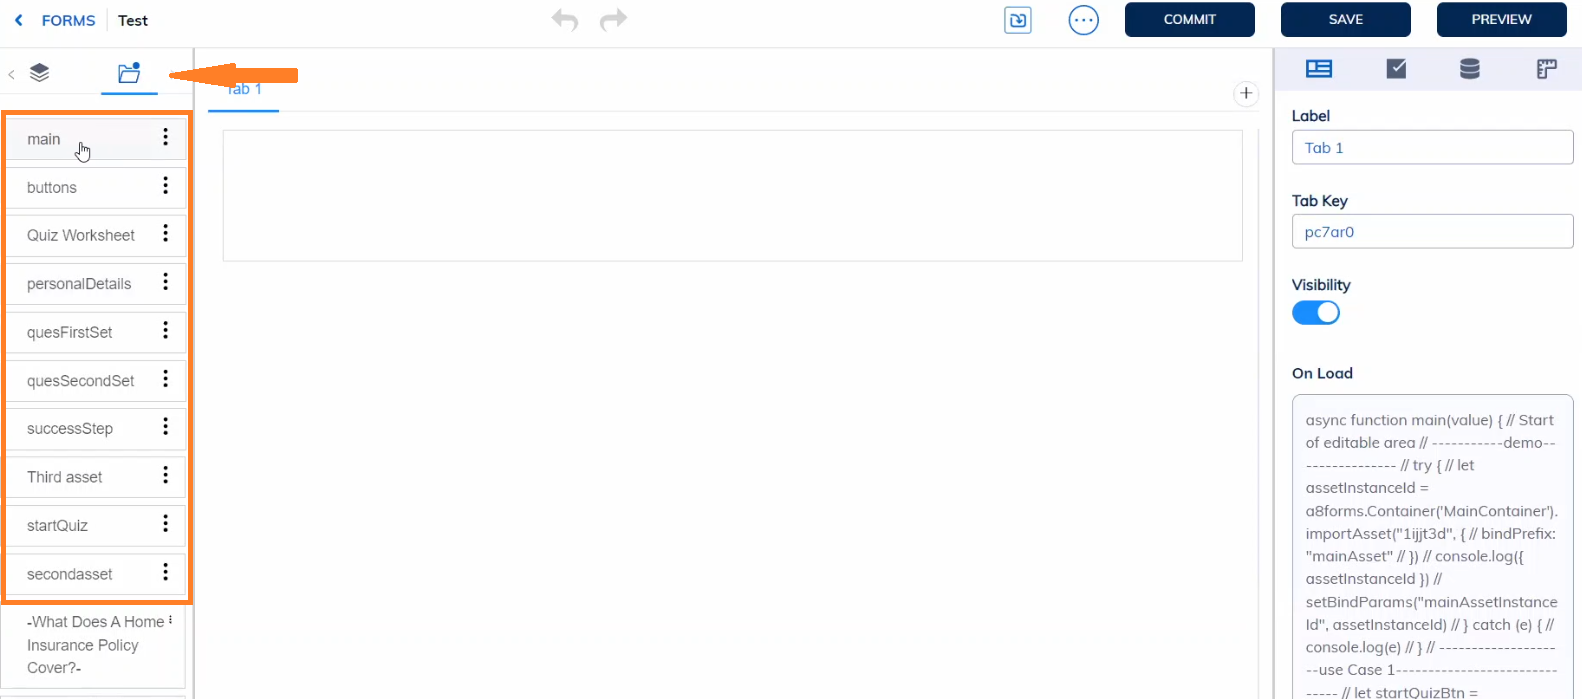
Step 02: Navigate to the Assets Tab.
Step 03: Drag and drop the desired asset onto the form.
Right-click the asset and select "Unlink" to convert it into form components, enabling you to make edits as needed.

2) Adding Assets in Runtime
To "Add" an asset dynamically during runtime, use the importAsset() method:
- For Tab
- For Container
- For Section
a8forms.Tab("tabID").importAsset("assetID",{
    bindPrefix : "prefix word"
// Bind-Prefix: (*Mandatory)
// Is a prefix word that you add to the "Bind" property of each component within the imported asset.
// With this, you make the "Bind" of each component unique, even if you're reusing the same asset in different places.
    after : "component ID"
// After: (*Non-Mandatory)
// The "after" parameter allows you to position the imported asset after a form element (here, a "component") within your form's structure.
})
a8forms.Container("containerID").importAsset("assetID",{
    bindPrefix : "prefix word"
// Bind-Prefix: (*Mandatory)
// Is a prefix word that you add to the "Bind" property of each component within the imported asset.
// With this, you make the "Bind" of each component unique, even if you're reusing the same asset in different places.
    after : "section ID"
// After: (*Non-Mandatory)
// The "after" parameter allows you to position the imported asset after a form element (here, a "section") within your form's structure.
})
a8forms.Section("sectionID").importAsset("assetID",{
    bindPrefix : "prefix word"
// Bind-Prefix: (*Mandatory)
// Is a prefix word that you add to the "Bind" property of each component within the imported asset.
// With this, you make the "Bind" of each component unique, even if you're reusing the same asset in different places.
    after : "container ID"
// After: (*Non-Mandatory)
// The "after" parameter allows you to position the imported asset after a form element (here, a "container") within your form's structure.
})
Note: Once an Asset is imported, its "Asset Instance ID" is created. To grab the ID in a variable, use the following syntax:
// Assigning the generated "Asset Instance ID" to the variable "assetInstanceId"
let assetInstanceId = a8forms.Container("containerID").importAsset("assetID", {
        bindPrefix : "parentAsset",
    })
// The "assetInstanceId" value is bound to the "InstanceID" key, which can now be called from across other forms.
setBindparams("InstanceID", assetInstanceId)
3) Removing Assets in Runtime
To "Delete" an Asset in your form, the deleteAsset() method is used:
a8forms.Container("containerID").deleteAsset("assetID")
// (OR)
// a8forms.Section("sectionID").deleteAsset("assetID)
4) Editing Assets' Properties in Runtime
To change the properties of components within the assets:
a8forms.asset("assetInstanceId").yourComponent("yourComponentId").yourComponentMethods("...")
// Asset Instance ID: Is the unique ID of the Asset's instance, generated on asset import.
// Your Component ID: Is the ID of the component within the asset.
// yourComponentMethods("..."): Set the properties based on the component.
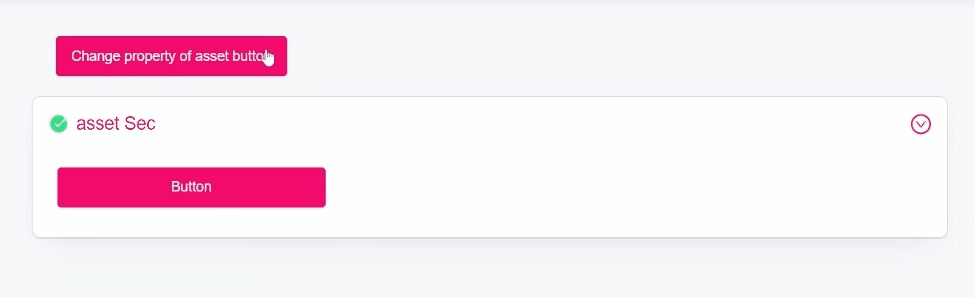
Here's an example where we change a button's "Type" (property) using a second button's click.
// Step 01: Store the changes in a "bindparams".
  if (bindParams.btn_type === "primary") {
    setBindParams("btn_type", "ghost")
  } else if (bindParams.btn_type === "ghost") {
    setBindParams("btn_type", "link")
  } else {
    setBindParams("btn_type", "primary")
  }

// Step 02: Apply the "bindparams" data to change the button type within an asset.
  a8forms.asset("assetInstanceId").Button("buttonID").setButtonType(bindParams.btn_type)
Asset Properties
The following properties are available for the Assets:

| Property | Description |
|---|---|
| Asset ID | The original ID of the asset (remains consistent across all instances). |
| Asset Label | The asset's name. |
| ID | ID of the primary container or section of the asset (remains unchanged). |
| Asset Instance ID | A unique ID generated for the specific instance of the asset (is unique). |
| Bind Prefix | Adds a prefix value to the "bind" of components within the asset. Use the syntax "${bindPrefix}_yourBindName" in each component's "bind" field for this prefix to function correctly. Note: The "bind" cannot be modified once the asset is created. |
Editing Or Deleting An Asset
Step 01: Click the dropdown on the asset. You should see the options Edit, Delete, and Copy ID in the menu.

Edit
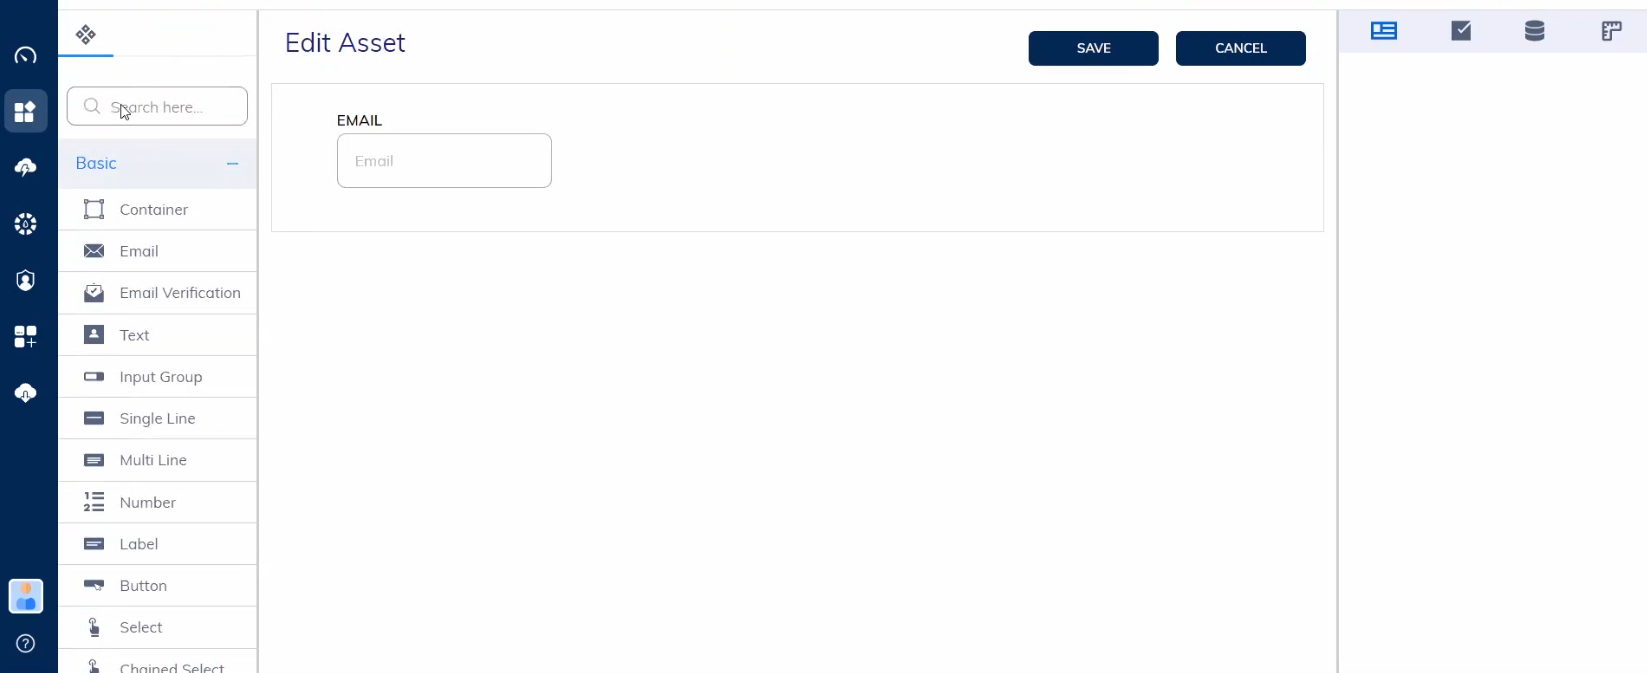
Step 02: To make changes to the asset, select "Edit". [This will open the asset's "form builder" screen.]
Step 03: Make the desired changes.
Step 04: Click on SAVE once you are done with the changes.
Note: Once you edit an asset, all its existing references will be altered as well.
Delete
Step 02: Select "Delete" to remove the asset from the assets list. [A confirmation window will pop up.]
Step 03: Click DELETE on the pop up window.
Copy ID
Step 02: Select "Copy ID" to quickly copy the Asset's ID.