Selfie
The "Selfie" widget provides users with access to the front-facing camera on their device, allowing them to quickly capture a selfie photo. It is ideally used in scenarios where user identity verification is necessary, such as during the authentication or registration process.
Furthermore, the widget includes a few quality control parameters designed to ensure that the captured photo meets specific standards. They are as follows:
- Checks to verify that the background is plain.
- Checks to ensure that the captured face is clear and well-lit.
- Checks to determine that the camera doesn't register more than one face within its frame.
On failing to meet any of these requirements, an appropriate "Error" message is thrown.
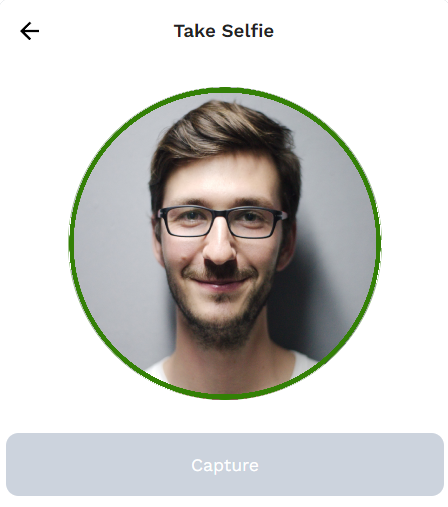
Selfie Properties
| Property | Description |
|---|---|
| Use External API [Checkbox] | Enables you to initiate the "Take", "Retake", "Use", and "Delete" interactions via a custom button click. |
| Text | Sets the text that's displayed under the selfie icon. |
| Align (Left/Center/Right) | Sets the alignment. |
| Button Label | Changes the "Text" overlay on the "Take Selfie" Button. |
| Button Font Size | Changes the font size of the text (under the selfie icon). |
| Button Height | Sets the height of the button. |
| Button Width | Sets the width of the button. |
| Button Background Color | Changes the background color of the button. |
| Button Font Color | Changes the font color of the "Text" overlay on the button. |
| Button Border Radius | Sets the border "curve" radius of the button. |
| Button Border Color | Changes the border color of the button. |
| Border Shadow | Adds a shadow to the border. |
| Button Alignment (Top/Center/Bottom) | Sets the alignment of the button. |
Selfie Configuration
| Configuration | Description | Value (Default) |
|---|---|---|
| vishwamDomainUrl | The URL (or API endpoint) enables access to the device's camera hardware. (To obtain your custom URL, contact the respective API provider.) | https://a8-staging.vishwamcorp.com |
| vishwamAppId | The App ID authenticates the API request and ensures that it comes from a trusted source. | autonom8 |
Using the Selfie
| Step 1 | Step 2 |
|---|---|
| Click the "Selfie" icon. | If prompted with a notification (on the browser) requesting access to the device's camera, select "Allow". Note: This will grant the necessary permissions for the application to use the device's camera hardware. |
| Step 3 | Step 4 |
Wait for a few seconds for the camera to initialize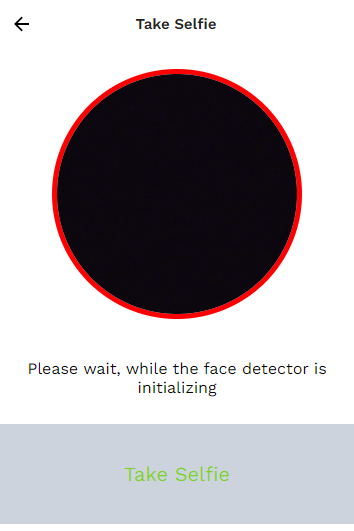 | On initiating, the camera should initiate and be viewable on the app - your selfie frame will be bordered by a red/green highlight. Red - States that the camera is "connected", but the picture isn't focused or clear. (Adjust the camera/angle until the highlight turns green.) Green - Indicates that the camera is focused and ready for you to click the selfie. 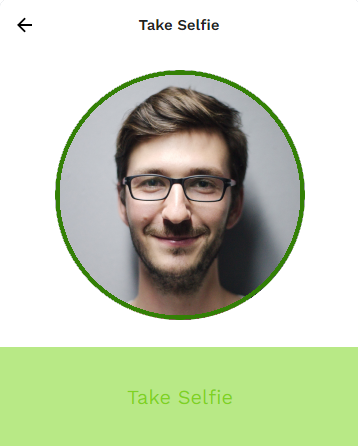 Once green, click on the "Take Selfie" (or the respective button) to capture the picture, which then displays the appropriate options. [Note: The button's size, color, and font are set in the properties panel.] |
| Step 5 | Step 6 |
If the picture you captured does not meet the requirements, an error message (with the appropriate reason) will be displayed along with two buttons - "Cancel" and "Retake".Click the "Retake" button to reopen the camera widget. Or click the "Cancel" button to close the widget without saving any changes. (OR) If the captured picture is clear, focused, and with a plain background, you will see two buttons - " Retake" and "Use This".Click the "Retake" button to get back to the capture mode; else, click the "Use This" button to confirm your picture. | 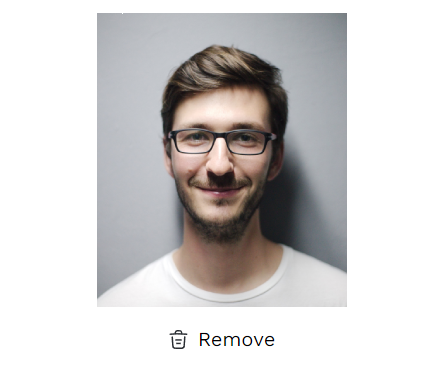 After you confirm the picture, a preview of it will be displayed on the app. It includes a "Remove" button, which will allow you to retake the selfie if necessary. |
If either - the widget hasn't detected the camera or you haven't allowed access to it, you will receive "two" options to proceed further:
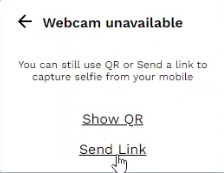
1) Show QR - Displays a QR code that, when scanned, opens the selfie widget on the respective/specific device.
2) Send Link - Displays a link that can be shared to a device with access to a camera. The selfie process can then be initiated on that device.
API Methods
takeSelfie
Initiates the selfie click.
- Method
- Usage
takeSelfie(condition: string): void
a8forms.Selfie("selfieId").takeSelfie()
reTake
Returns to the camera mode.
- Method
- Usage
reTake(condition: string): void
a8forms.Selfie("selfieId").reTake()
useThis
To confirm the selected picture.
- Method
- Usage
useThis(condition: string): void
a8forms.Selfie("selfieId").useThis()
delete
To delete the selected picture.
- Method
- Usage
delete(condition: string): void
a8forms.Selfie("selfieId").delete()
setVisibility
Sets the Visibility flag for this component.
- Method
- Usage
setVisibility(visible: boolean): void
// Setting the visibility to "true" makes the element visible
a8forms.Selfie("selfieId").setVisibility(true)
// Setting the visibility to "false" makes the element invisible
a8forms.Selfie("selfieId").setVisibility(false)
setVisibilityCondition
Sets the visibility condition for this component.
- Method
- Usage
setVisibilityCondition(condition: string): void
// Sets a condition for changing the element's visibility status.
a8forms.Selfie("selfieId").setVisibilityCondition("1 === 1")
Event Handlers
onCapture
onCapture - Sets the action to be performed when the "Capture" button is clicked.
onCameraDetect
onCameraDetect - Sets the action to be performed when the camera is (or isn't) detected.